Custom Fujifilm GFX settings for landscape photography
Recently I acquired a Fujifilm GFX 100s, a digital medium format camera ideally suited for shooting high megapixel landscape images. After receiving the camera, I spent time reading its online manual to learn which settings are most appropriate for landscape images when using the GFX mounted to a tripod, then built out a couple of custom shooting modes (C1 and C2) with my preferred settings.
In practice, I like using custom modes because then I know exactly which settings a camera is using, and there are no surprises or gotchas from previous images that could mess things up (or require time changing).
Before I explain the customized settings I used for landscape photography and the reasons behind them, let's start by understanding how Fujifilm's custom shooting modes work.
How GFX custom modes work
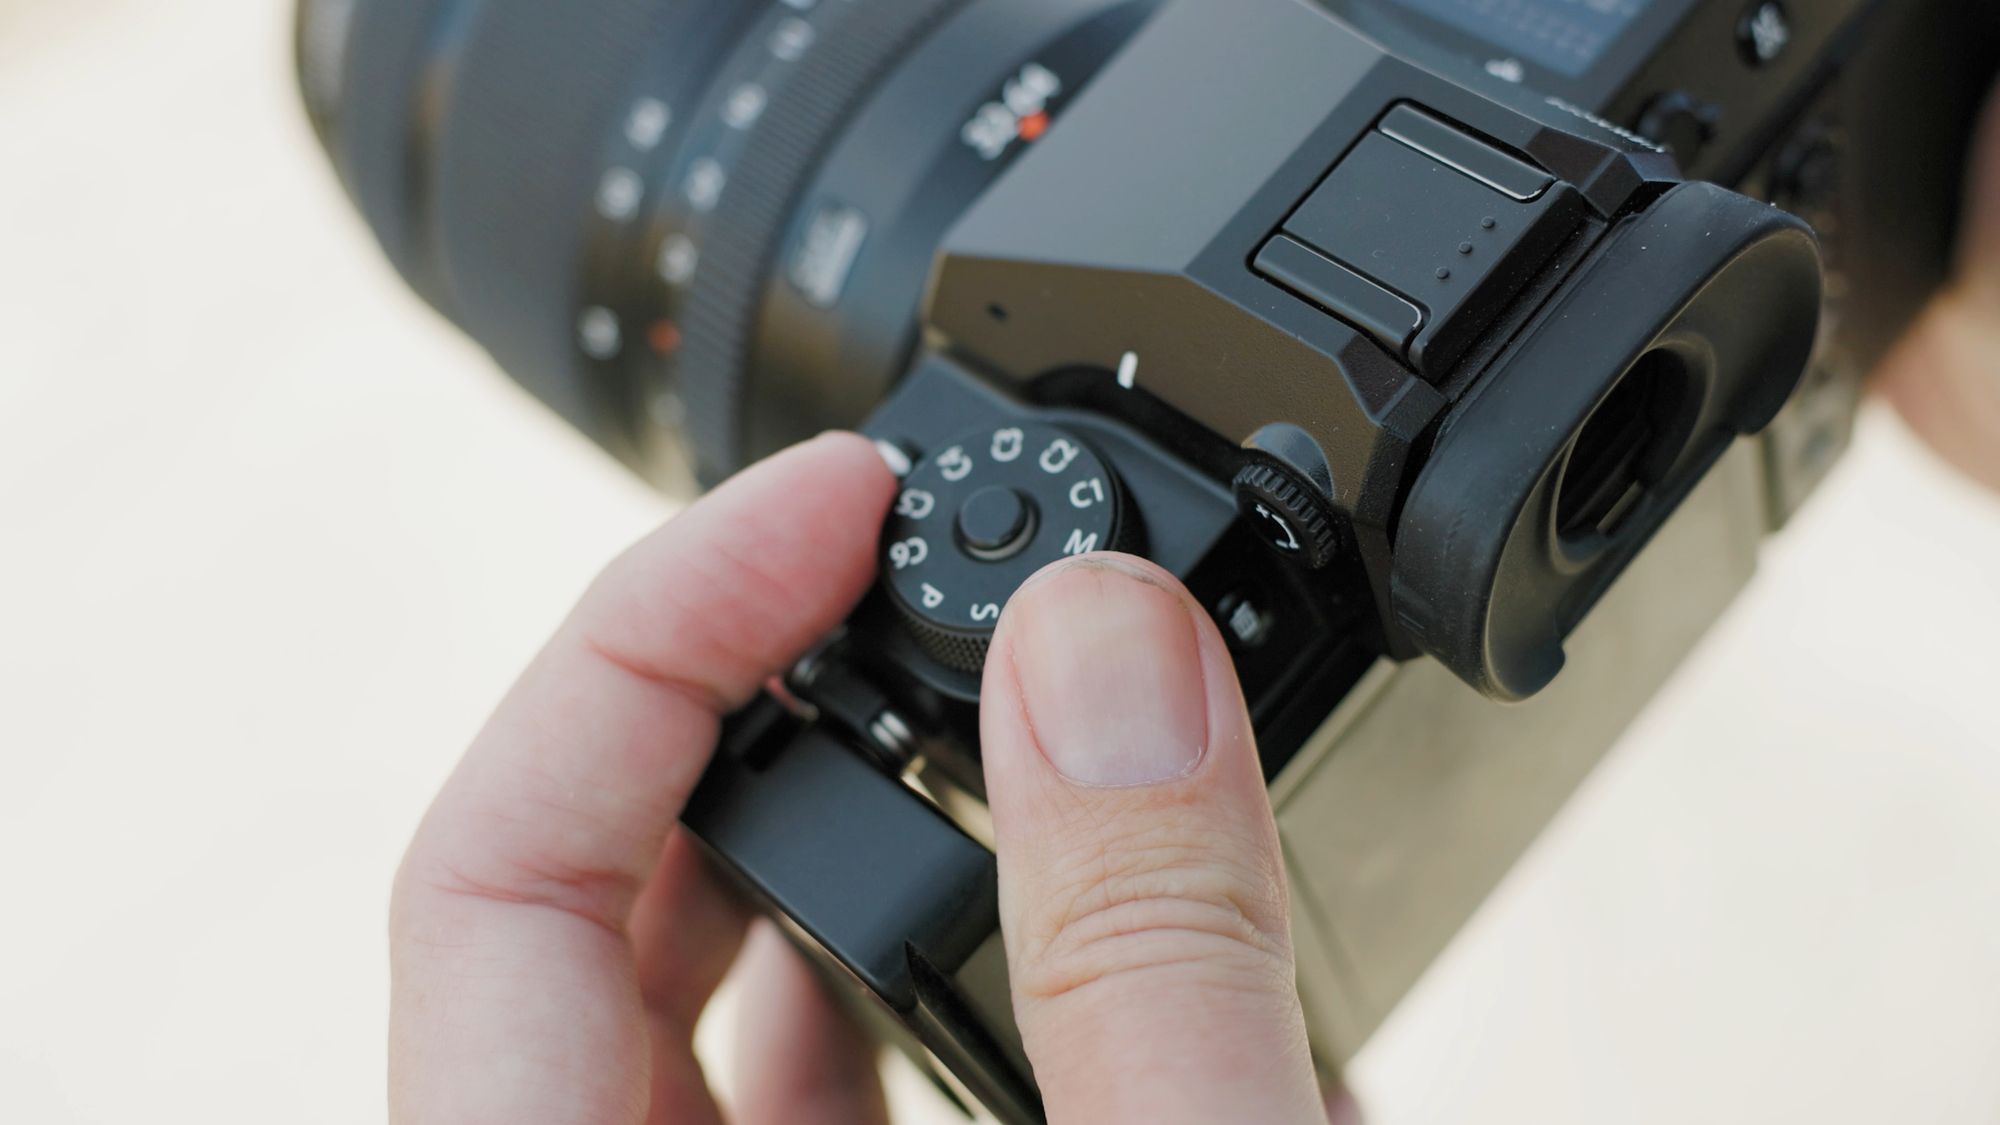
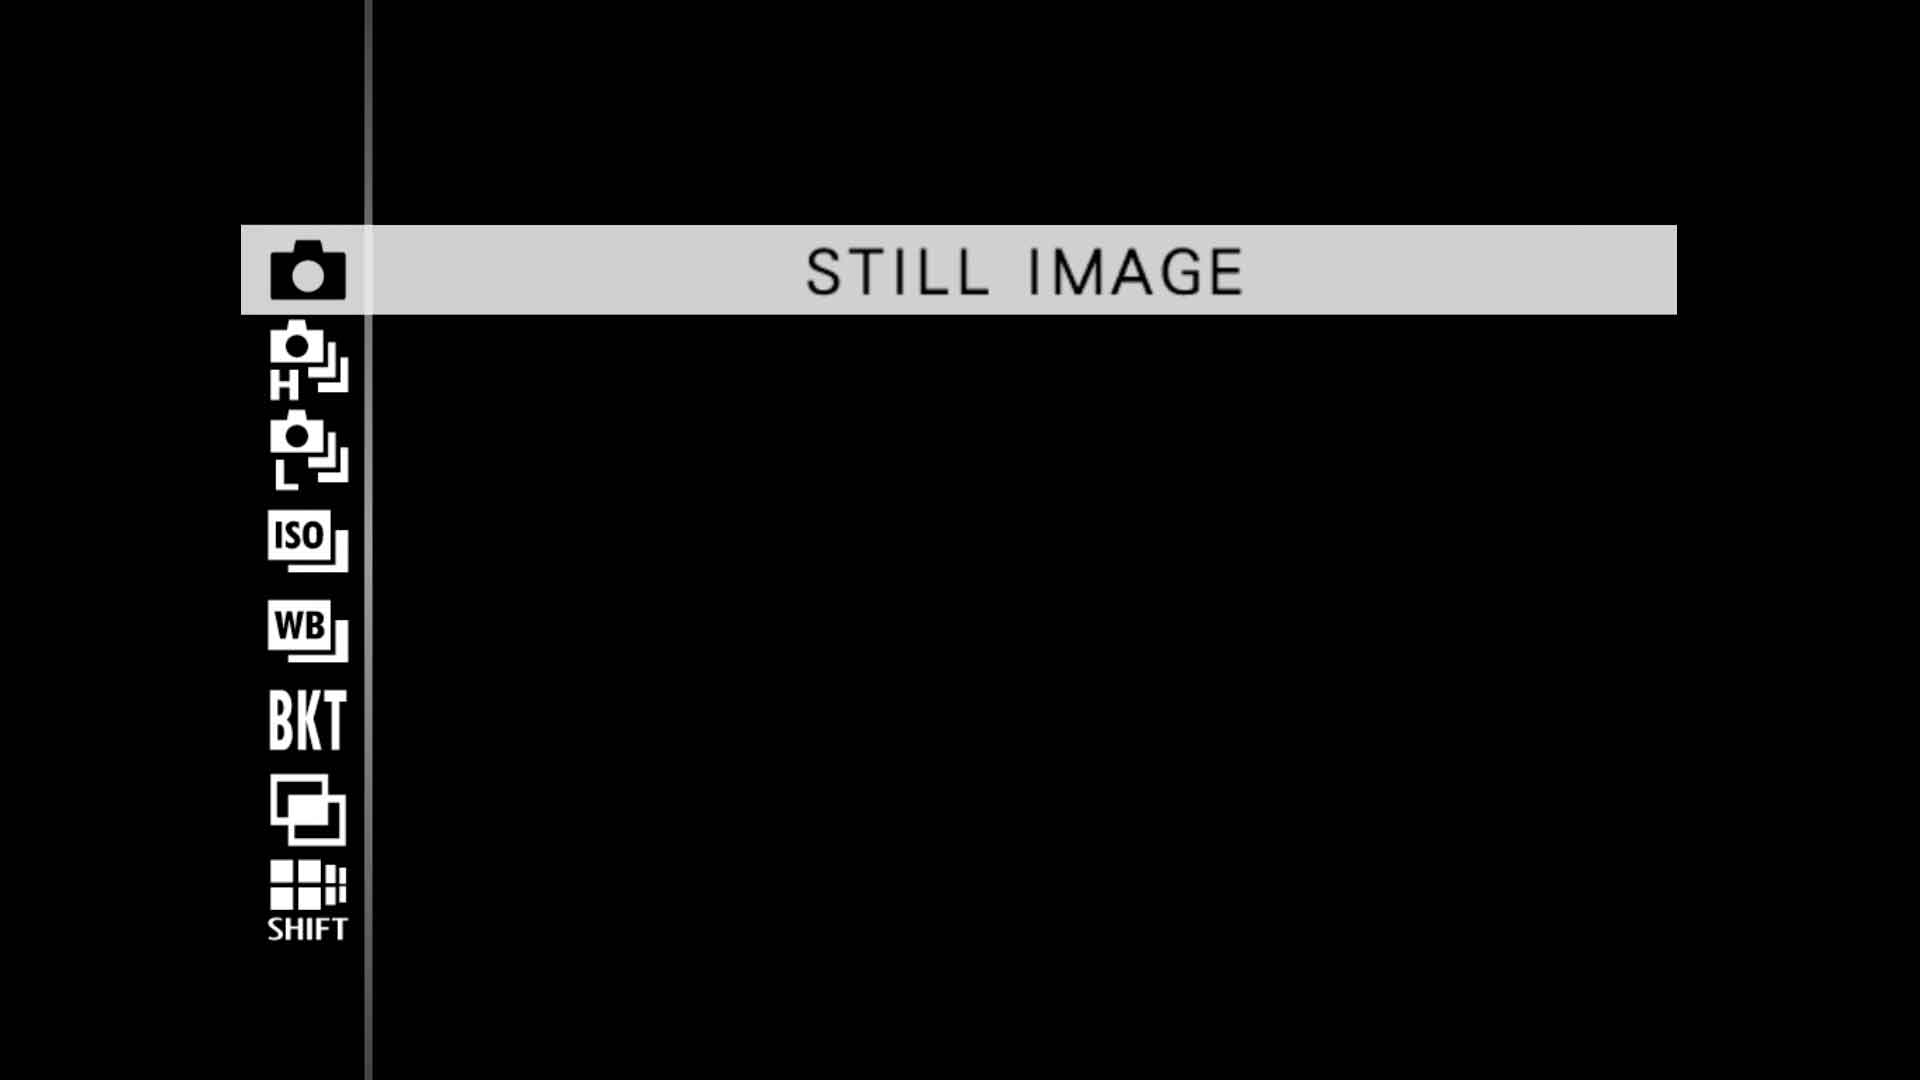
The GFX 100s has six custom shooting modes (C1-C6) selectable through a mode dial at top left.
Nearly everything on the camera can be saved as a custom shooting mode. Some camera settings (eg, "Setup") are saved globally and cannot be changed, but just about everything else is fair game.
Custom modes are edited and saved on page 3 of the "IQ" (Image Quality) menu. Why this menu and not "Setup" feels odd to me, but that's where custom modes are edited at the time of this writing.
To create a custom mode, turn the mode dial to C1, then press the "Menu" button on the back of the camera. The first thing you should do is enable "Auto Update Custom Setting" (pictured below). When set to "Enabled", any camera setting that is changed will be automatically saved to C1, or whichever custom mode you have selected. Settings will then stick after a camera goes to sleep or is powered off.
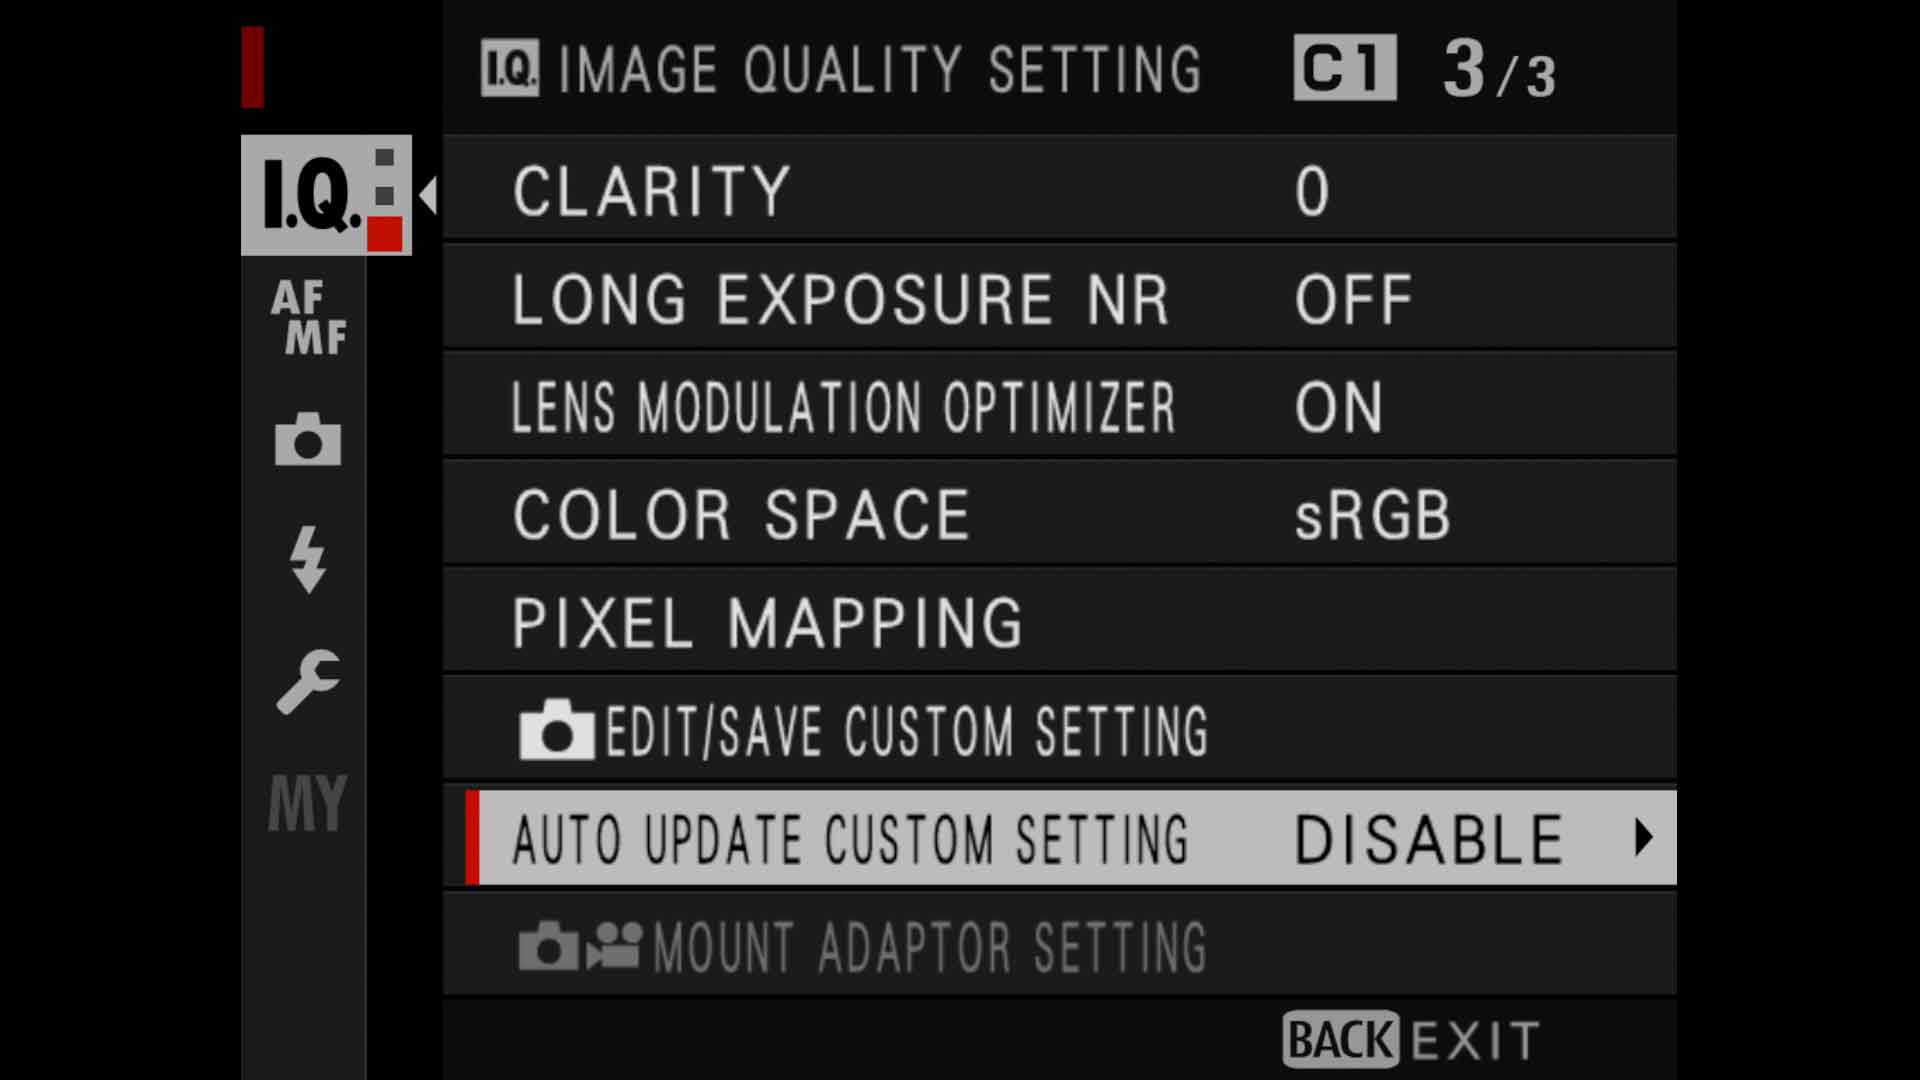
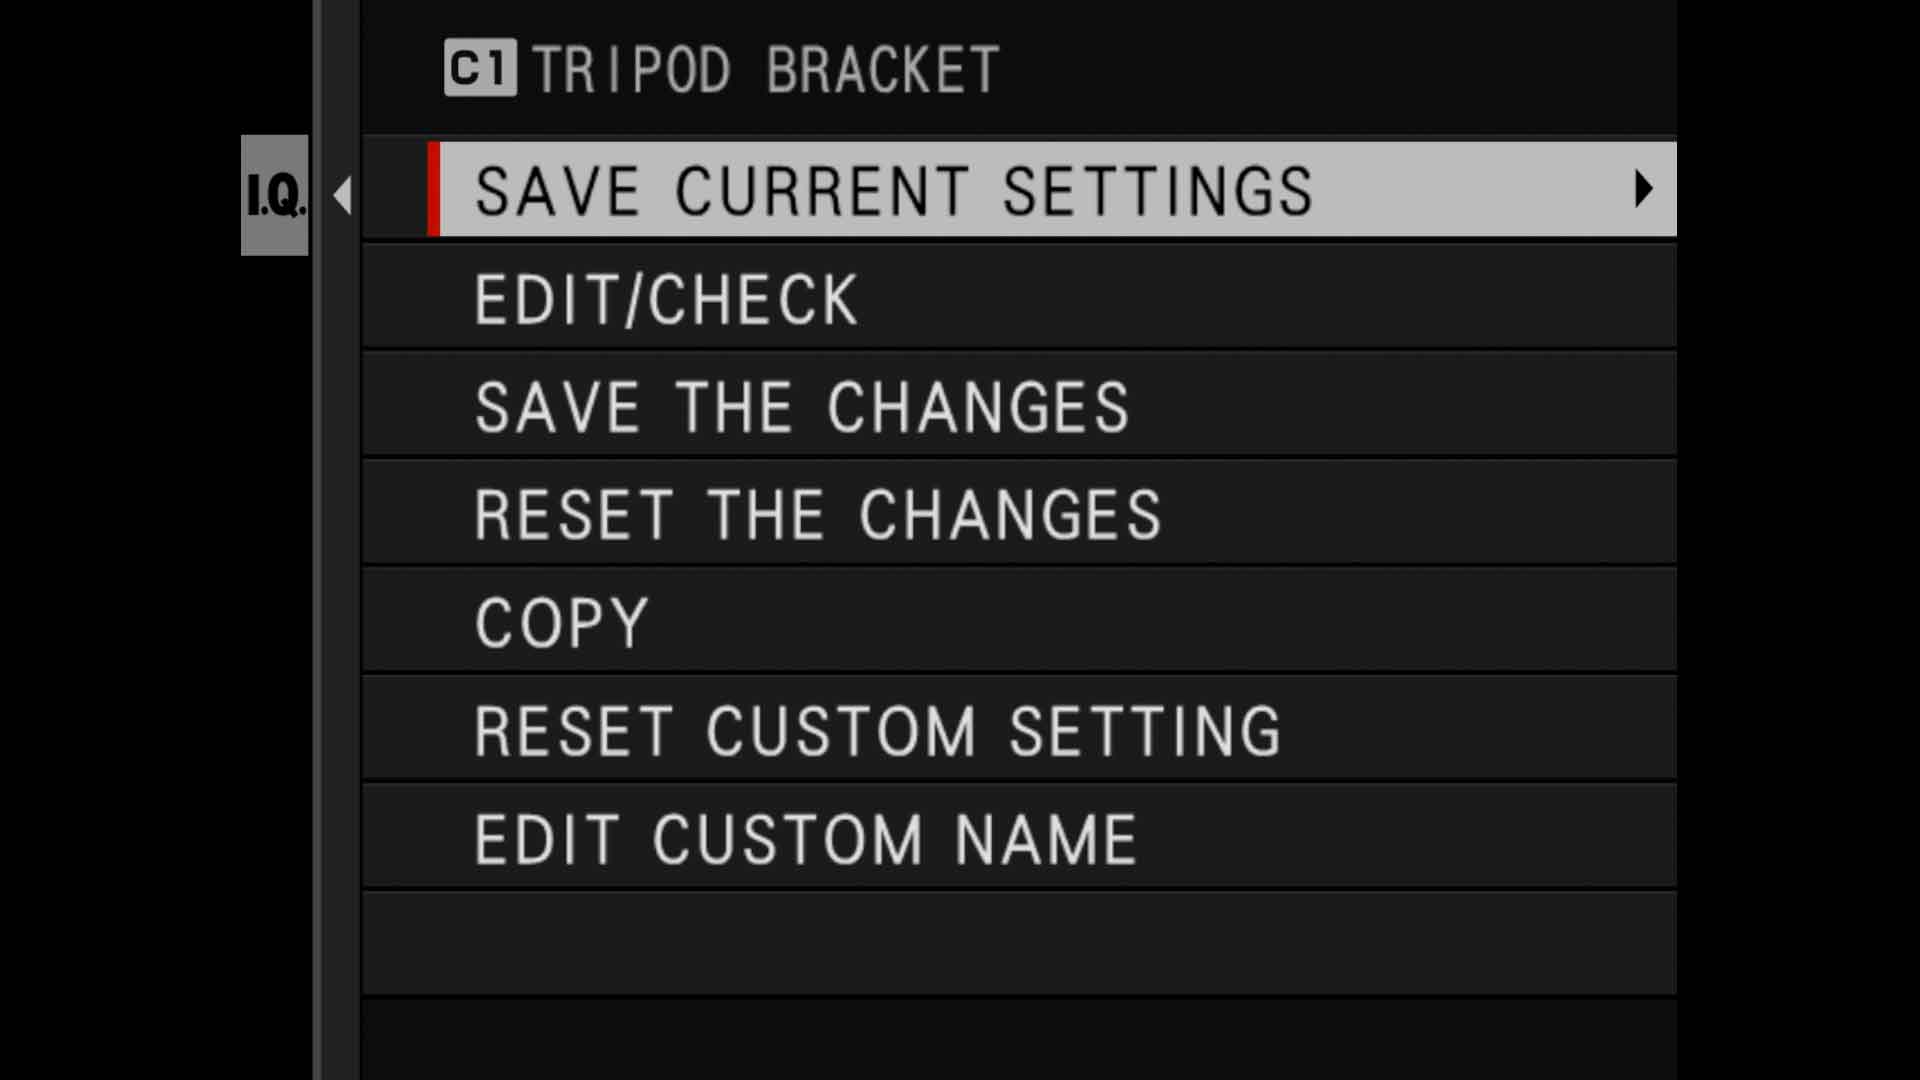
After you've used the custom mode for a while and are comfortable with how it works, I recommend switching this to "Disable". Mode settings will then no longer automatically update, though you can still overwrite a custom mode with new settings anytime you need to. To do that you simply select "Edit/Save Custom Setting", choose the mode you're currently shooting with, then select "Save Current Settings" (pictured below).
Landscape settings for C1 custom mode
For C1, I wanted settings that would be most appropriate for shooting bracketed raw images with the GFX mounted to a tripod. This is something I do all the time when shooting landscapes, so I want a custom mode preconfigured with all the right settings, ready to go at any time.
Assigning a drive mode
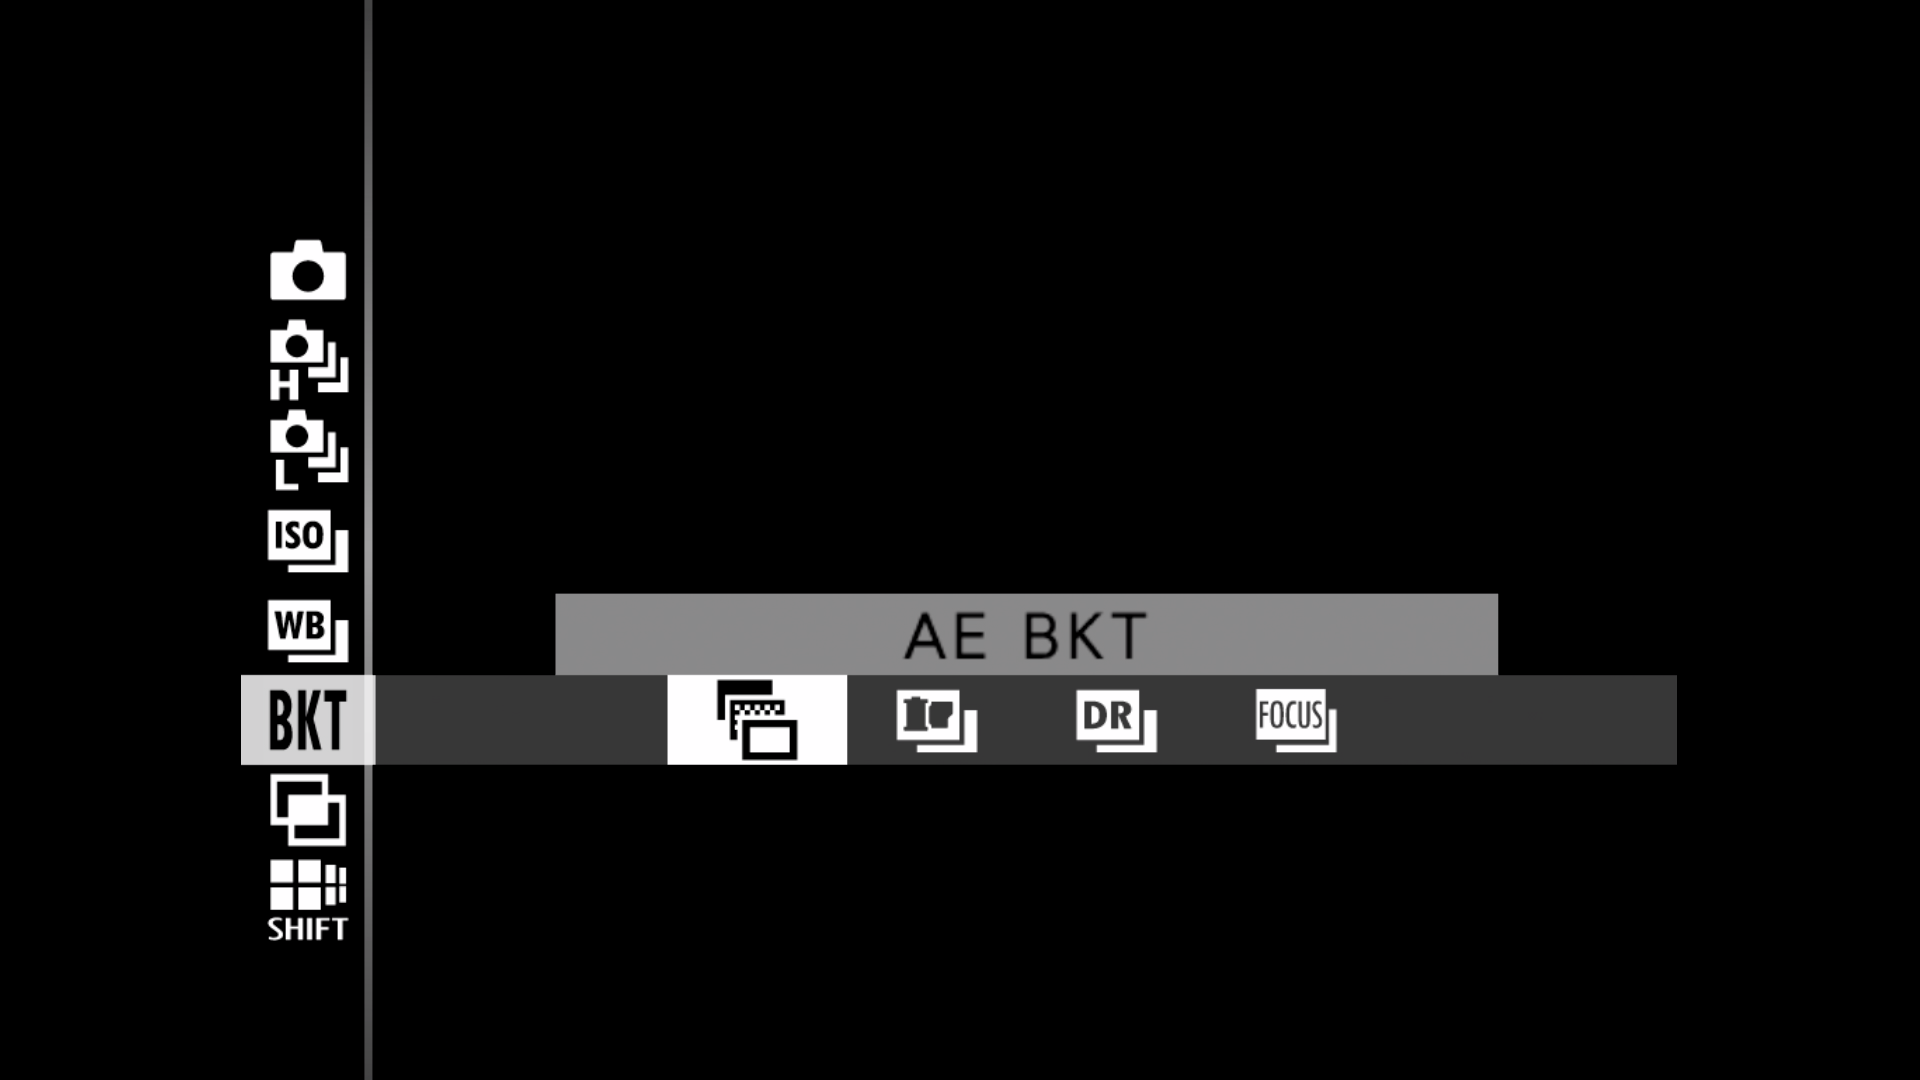
With C1 selected in the mode dial, I first press the "Drive" button on the back of the camera, then scroll down and select "AE BKT" mode (pictured below). This is the "Auto Exposure Bracketing" mode, where the camera captures multiple images at different exposures for HDR blending later in post.
Assigning shooting mode, ISO, etc
Next step is assigning some basic shooting settings through the quick menu. Press "Q" on the back of the camera to view the Quick menu, and here you'll see four columns and rows of configurable settings. Navigate to a setting using the thumb joystick, then turn the command dial to change its value. Here is what mine looks like:
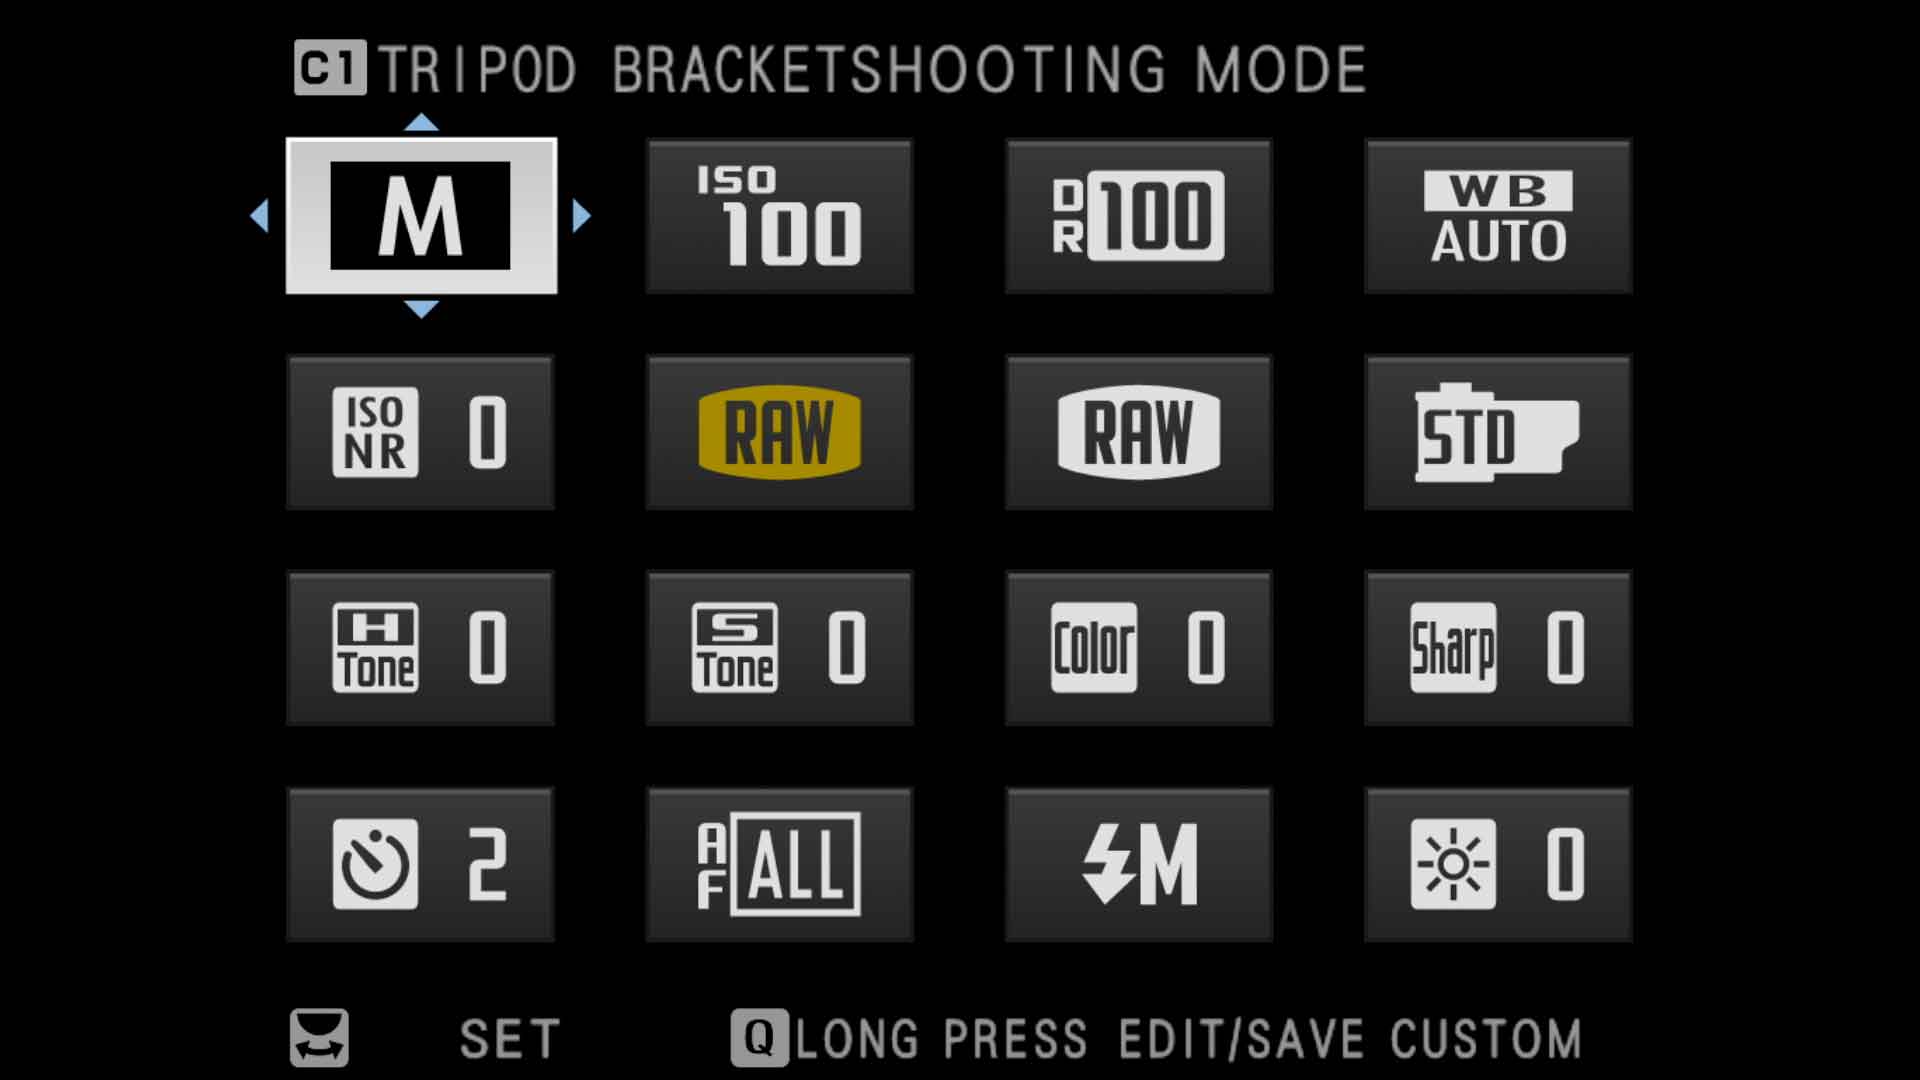
- Shooting Mode set to Manual ("M")
- ISO set to 100
- Image Quality set to "Raw"
- Self-Timer set to "2 seconds"
Manual is my preferred mode, for then I have total control over shutter speed, aperture and ISO. Speaking of ISO, 100 is the practical minimum for the least amount of noise. I only shoot raw images in this mode (no need for JPG), and a two second timer helps mitigate any vibrations that might occur after pressing the shutter button.
Next, press the "Menu" button on the back of the camera to edit the following.
Menu > Image Quality Settings (IQ icon)
- Raw Recording > Lossless 14-bit
- Long Exposure NR > Off
- White Balance > 5500 kelvin
This setting controls whether the camera applies noise reduction when long exposure images are created. I'd rather apply my own noise reduction using Lightroom or a third party app.
Finally, I set White Balance to 5500 kelvin, which is a neutral, daytime color. I set this to a fixed value because auto white balance (AWB) on the GFX gets super warm when shooting in dim light at blue hour and golden hour, and even though I can easily edit white balance later with the raw file, I'd rather use a fixed, neutral value to capture scenes as they are.
Menu > AF/MF Settings (AF MF icon)
- AF+MF > On
- Focus Check > On
- MF Assist > Focus Peak Highlight > Red (High)
Setting "AF+MF" to "On" allows manual focus overrides while in autofocus mode. This works in tandem with "Focus Check" which automatically zooms the LCD preview when the manual focus ring is turned (with the shutter pressed halfway down), or when double tapping the preview screen. "MF Assist" enables focus peaking with red highlights to make the areas in focus easier to see.
Menu > Shooting Settings (camera icon)
- Save Self-Timer Setting > On
- Self-Timer Lamp > Off
- AE BKT Setting > Frames/Step Setting > ±3 frames, 2 step
- AE BKT Setting > 1 Frame/Continuous > Continuous
- IS Mode > Off
"Save Self-Timer Setting" saves the self-timer setting (2 seconds, as set earlier) so it is automatically enabled when switching to C1. I don't know why this setting requires its own override, but that's how Fujifilm designed it.
"Self-Timer Lamp" controls whether a blinking light is displayed on the front of the camera while counting down. I have no use for that when shooting landscapes, so I set this to "Off".
Next, exposure bracketing. This is where the number of bracketed images and stops are assigned. ±3 shoots one under, one over, and one properly metered image, while "2 steps" sets the under and over exposed images to -2 and +2 stops. I prefer 2 stops because digital cameras have considerable exposure latitude on their own, so ±2 gives me a even more dynamic range to work with later when merging to HDR.
Also with exposure bracketing, I set "1 Frame/Continuous" to "Continuous" so all bracketed images are captured with one shutter release.
Finally, "IS Mode" controls in-body image stabilization. IBIS is only useful when shooting handheld, and the GFX manual recommends disabling it anyway when shooting on a tripod, so I set this to "Off".
Menu > Set Up (wrench icon)
- Sound Set-Up > Everything "Off" except shutter volume
I don't like to hear sounds when I'm in a quiet landscape, so I shut the volume off for everything but the shutter. To further conserve power, I set "Performance" to "Normal", for in this mode I'm shooting slowly and methodically and don't need faster focusing or EVF display performance.
Finalizing the C1 shooting mode
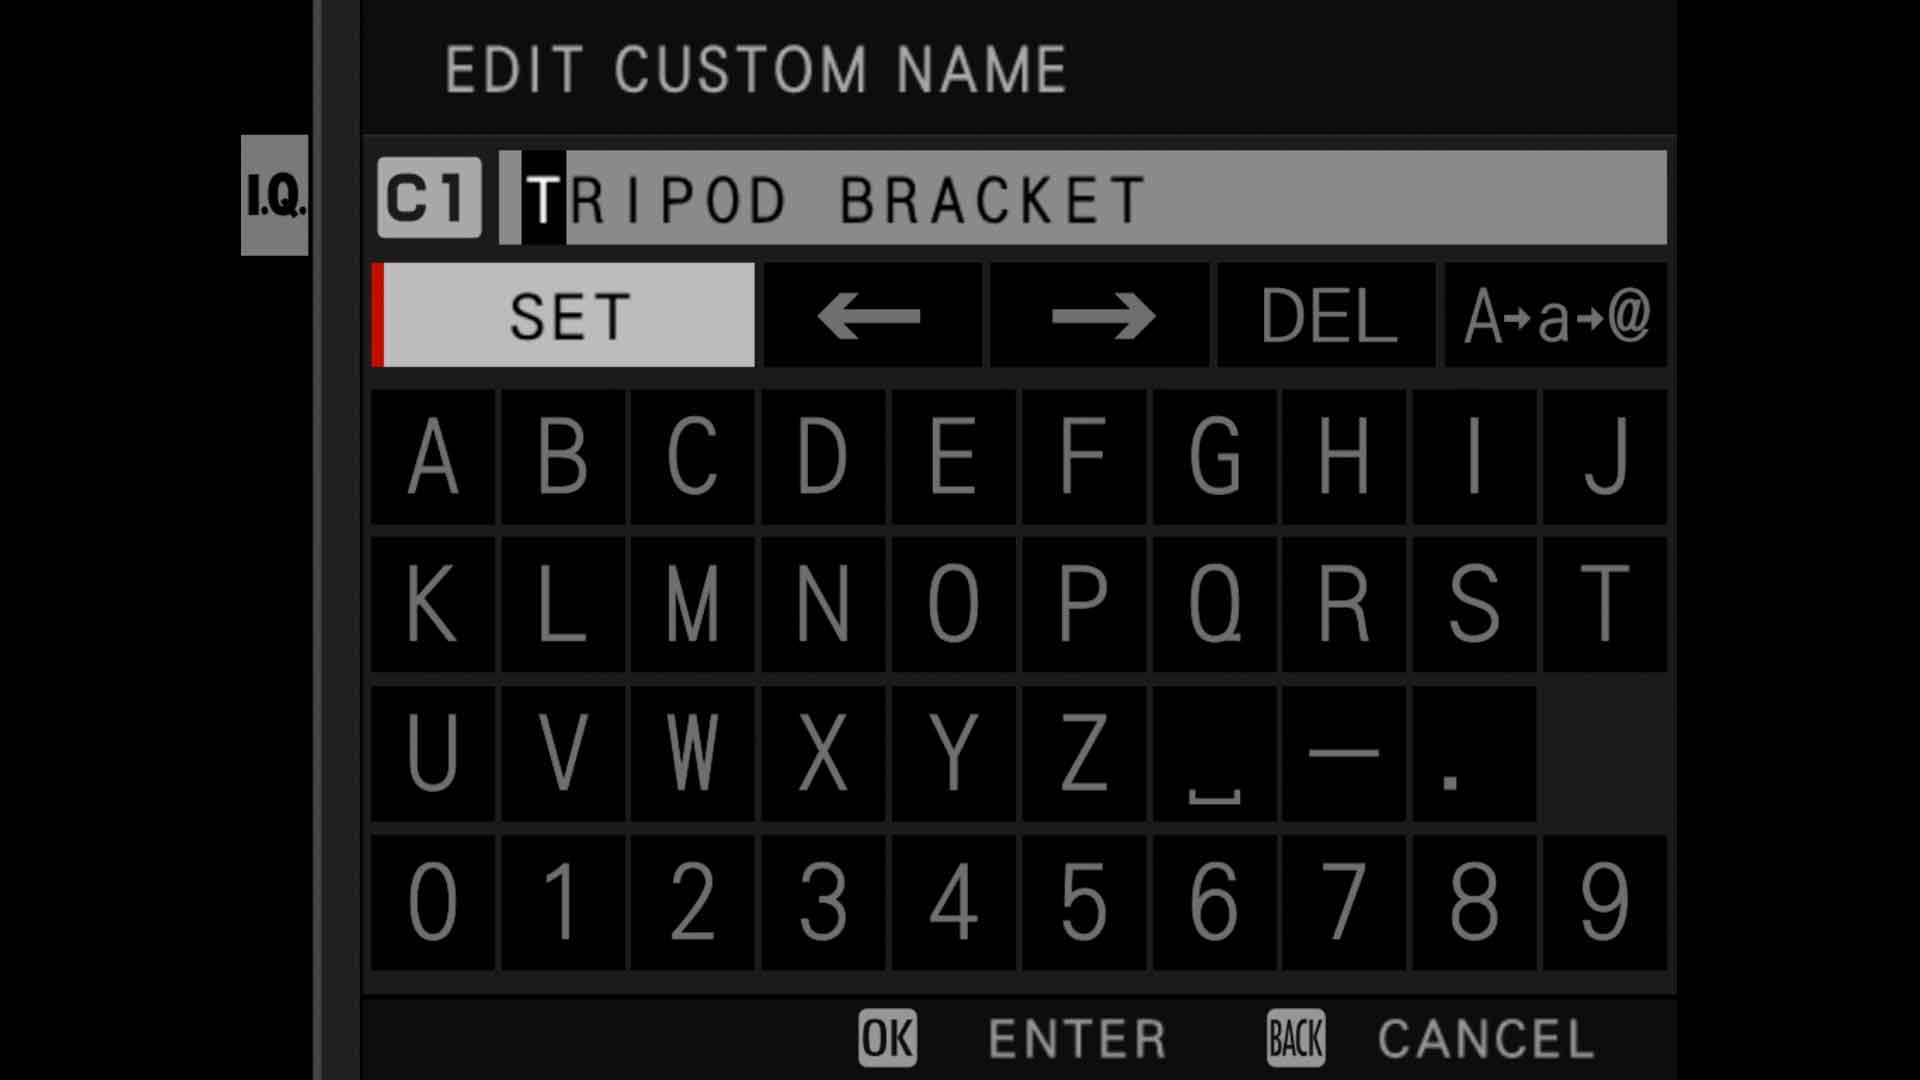
With everything setup the way I want, I now assign C1 a custom name (eg, "Tripod Exp Bracket") through "Edit/Save Custom Setting > C1 > Edit Custom Name". This should make remembering what each setting does easier down the road when more are added.
Next step is switching "Image Quality > Auto Update Custom Setting" back to "Disable". As I wrote about earlier, this prevents any future setting changes from being automatically assigned to C1 unless I explicitly want them. If I do, I can simply go back to "Edit/Save Custom Setting" and save my current settings.

Duplicating and customizing C1 for C2
Now I'd like to have a similar tripod shooting mode, but with a "single image" drive mode instead of bracketing. Fortunately, this is simple and easy to do by selecting "IQ > Edit/Save Custom Setting > [mode] > Copy", then choosing which custom mode the settings should be assigned to.

When finished, I switch the mode dial to "C2", press the "Drive" button on the back, then select the first "Single Image" mode.
Now I have the same tripod shooting settings for C2, but the camera will now shoot single images instead of bracketed exposures. This is helpful for low-contrast shots with limited dynamic range that wouldn't benefit from creating multiple exposures. It also helps save SD card space, which comes at a premium with a high resolution camera like the 100s.
Speaking of card space, for this mode I'm also using Lossless 14-bit. Bumping this up to Uncompressed 16-bit is tempting for the absolute best possible image quality. But raw files are then much larger, and from what I've read online from people who've been using the camera longer than me, there is little-to-no perceivable difference compared to Lossless 14-bit.
Optional additional settings
If interested in exploring other GFX settings here are a few more I've edited to help improve the camera's usability and performance.
- Setup > Connection Setting > Bluetooth/Smartphone Setting > Bluetooth On/Off > Off
I set this to "Off" because I don't plan on connecting the camera to my smartphone, and I'd rather not waste battery cycles on something I'm not using.
- Setup > Screen Setting > Autorotate PB > On
When set to "On", portrait images will automatically rotate to their proper orientation when previewing images.
- Setup > Screen Setting > Disp. Custom Setting > Framing Guideline (Enabled)
This adds a 9-slice grid to the LCD screen to help make composing images easier. I like using it.
- Setup > Function (Fn) Setting > Fn2 > Electronic Level
This changes the behavior of the Fn2 button (top right) to show/hide electronic leveling lines over an image in the LCD preview. Helpful when leveling is important.
- Setup > Function (Fn) Setting > Fn3 > Histogram
This displays a full RGB histogram over an image in the LCD preview, plus clipping warnings.
- Setup > Button/Dial Setting > Touch Screen Setting > Double Tap setting > On
When set to "On", the LCD preview zooms-in when double tapped.
Summary
With these two custom settings assigned to C1 and C2, I now have exactly what I need for the majority of images I create. I'll likely end up adding more custom modes in the future, but these will do the job for now.