New Point Color and Lens Blur tools in Lightroom (plus future predictions)
Adobe has updated Lightroom, Lightroom Classic and Camera Raw with two new tools: Point Color and Lens Blur. Through this update, Adobe has also added local storage and editing to Lightroom CC (the cloud-based version), plus the ability to edit and export HDR format images in the AVIF and JPEG XL formats.
Point Color
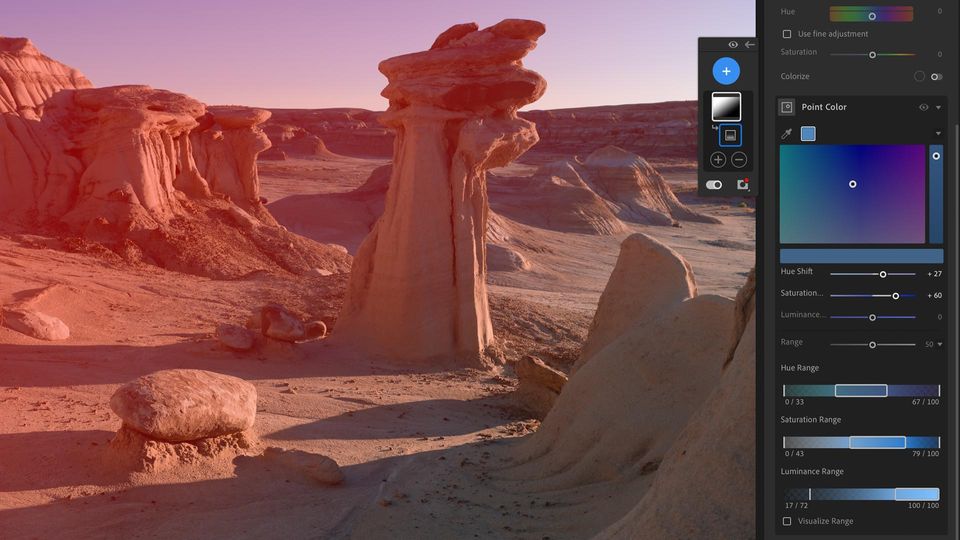
Point Color is a new, more user friendly interface for the pre-existing HSL panel. Using an eyedropper tool, the user may select a specific color in their image, then adjust the range of their selection by hue, saturation, and/or luminance. There's also a toggle that turns unselected areas monochrome to make color selections easier to see.
The user may then adjust the hue, saturation and luminance of their selected color using sliders or through a nice color wheel style interface (seen above) that adjusts hue and saturation, plus a vertical luminance slider on the right. I like this interface a lot, for it does a better job of visualizing color changes than the skinny horizontal sliders.
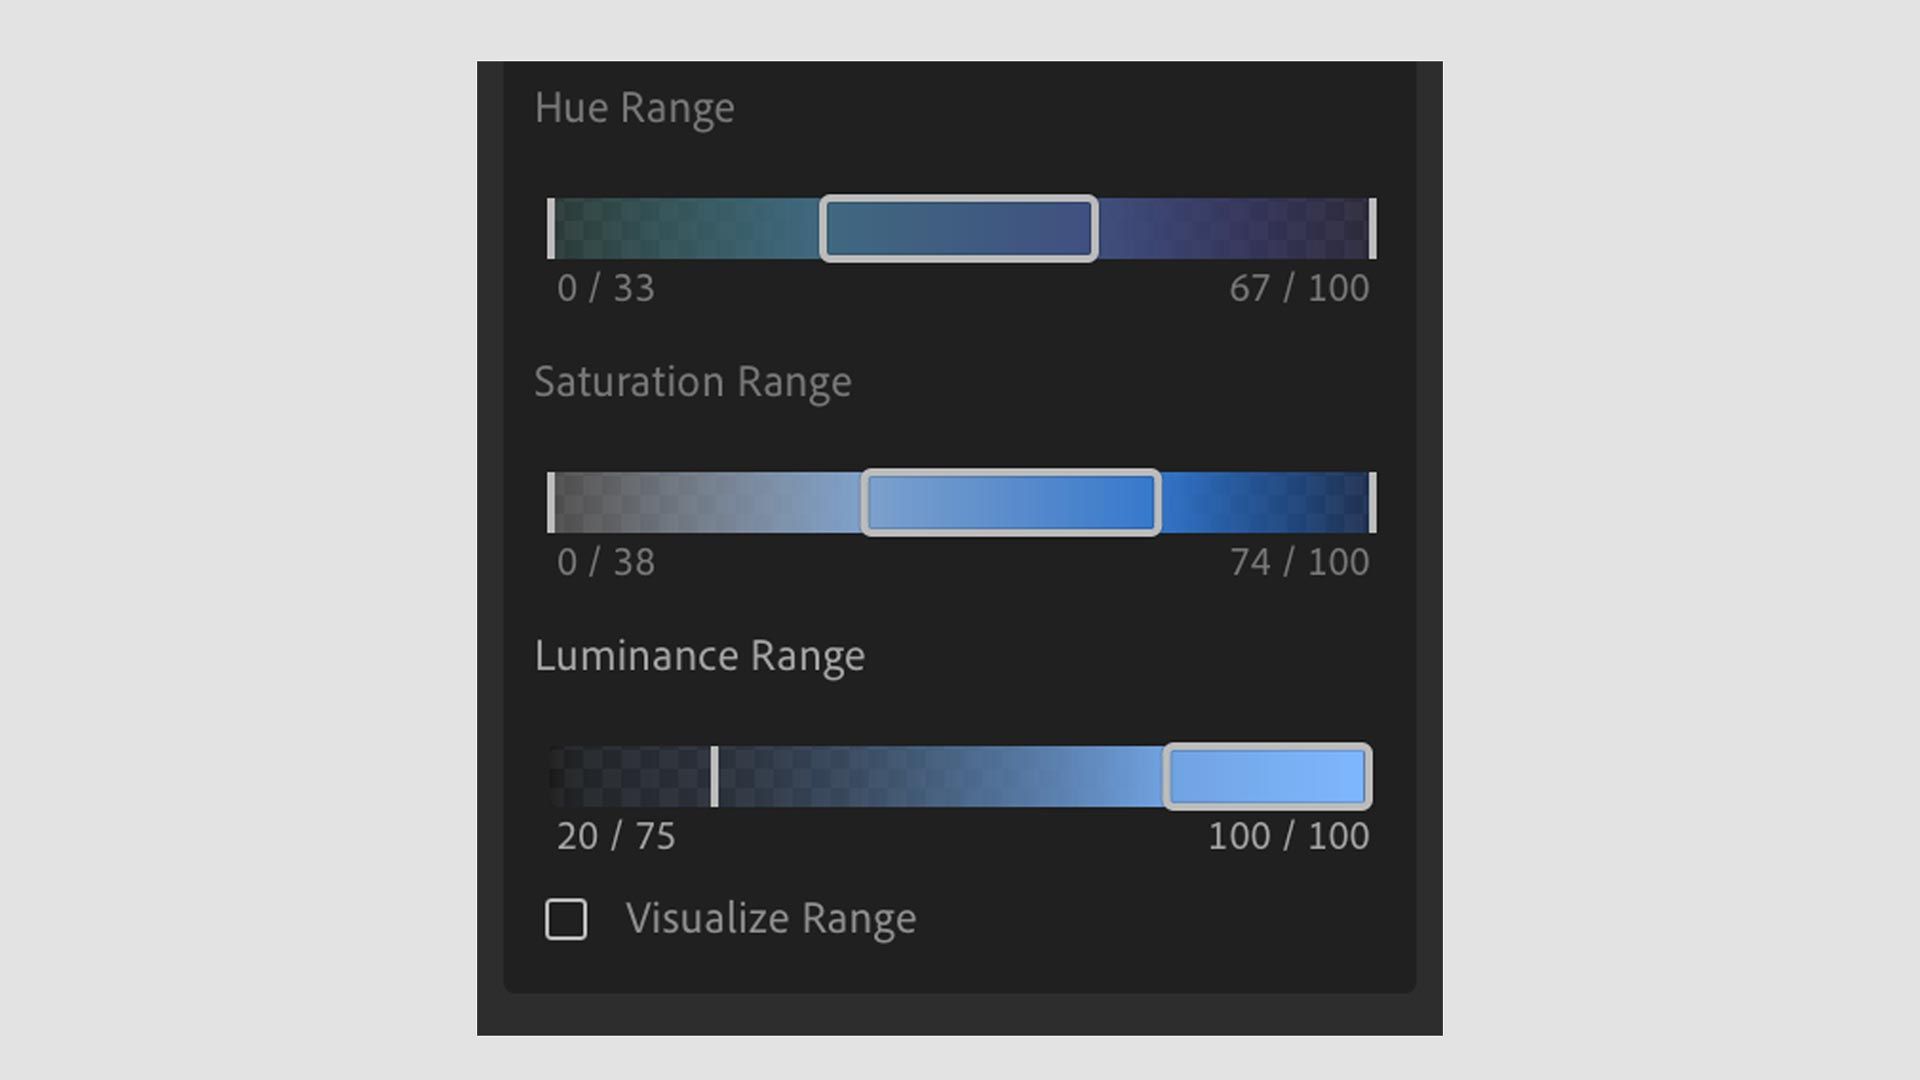
Similar to the Range mask tools, Point Color also includes Range adjustment sliders (seen below) for Hue, Saturation and Luminance to make a color selection more exact.
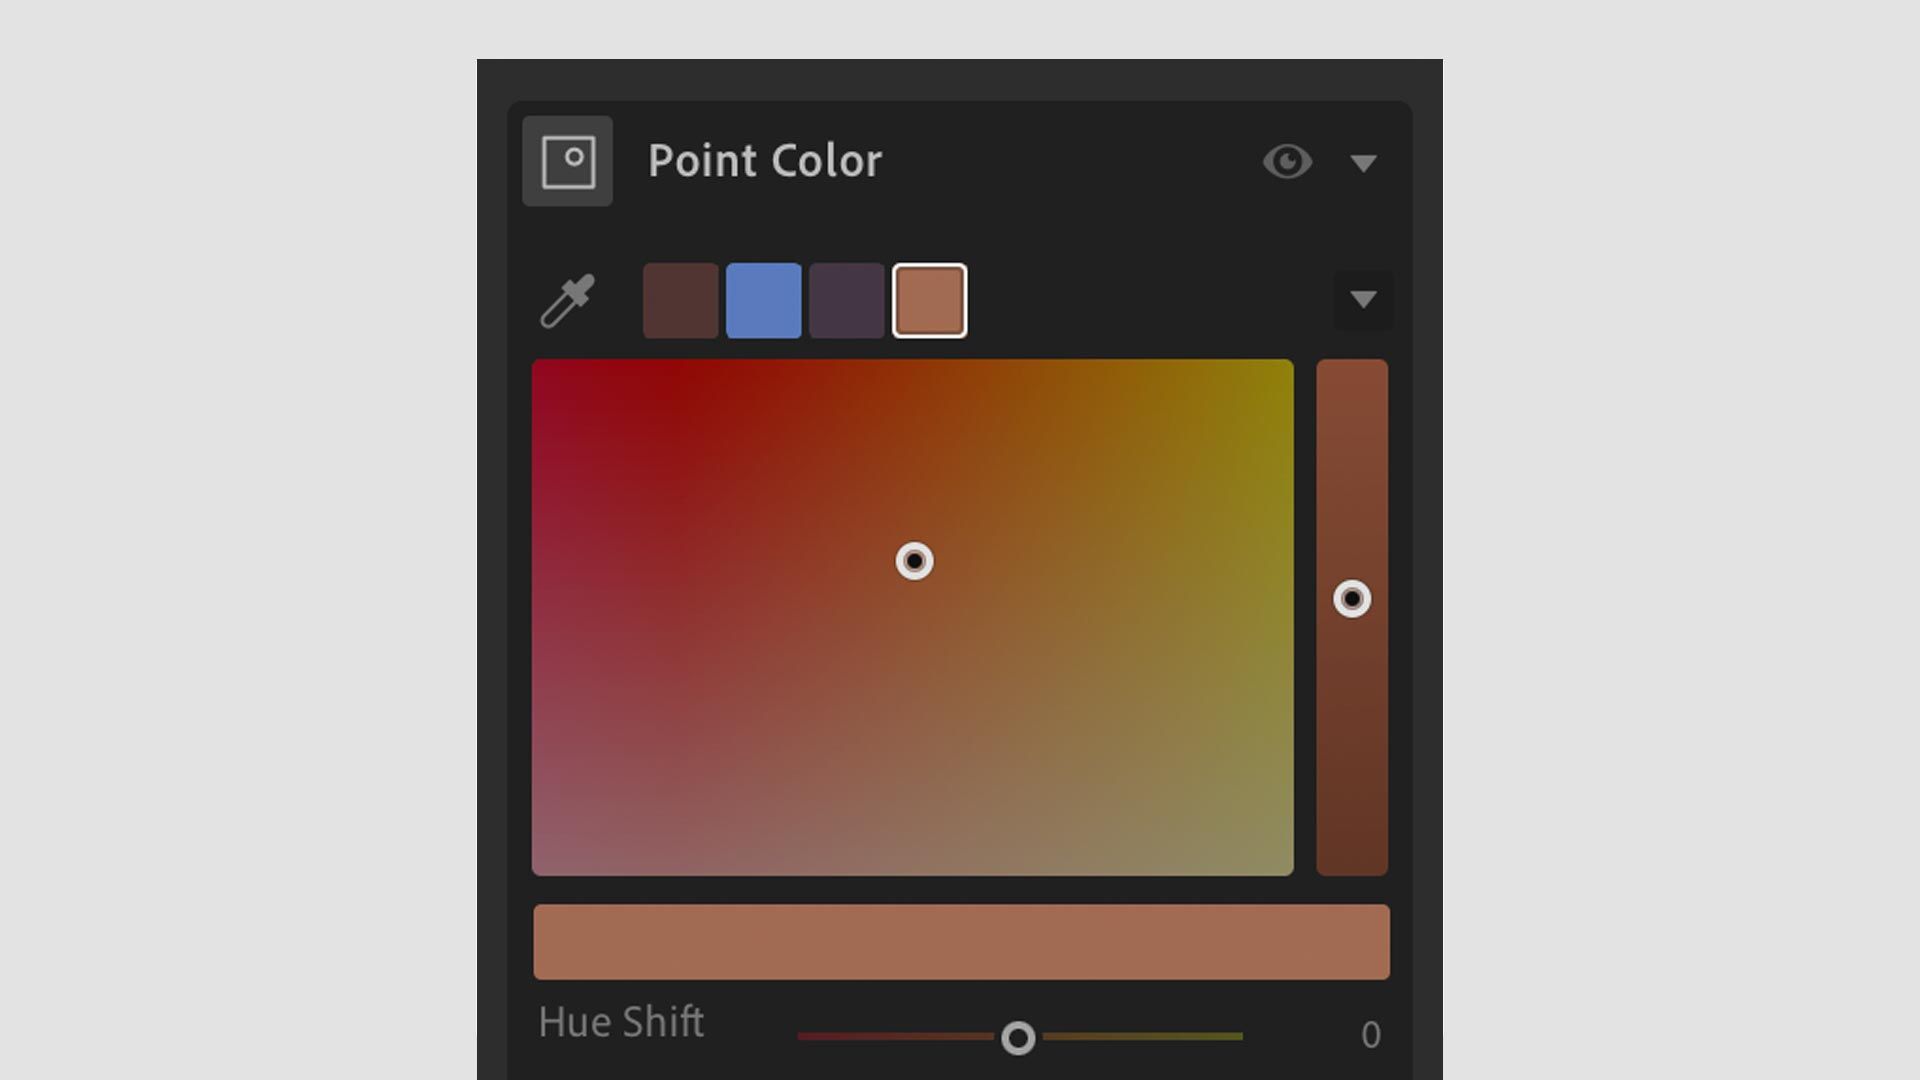
Click the eyedropper tool again, then select another color in the image. This adds a second swatch alongside the first at the top of the Point Color interface. Repeat to create as many color swatches as you need. Right click on a swatch to delete it (or delete all swatches). Below is an example with four colors selected.
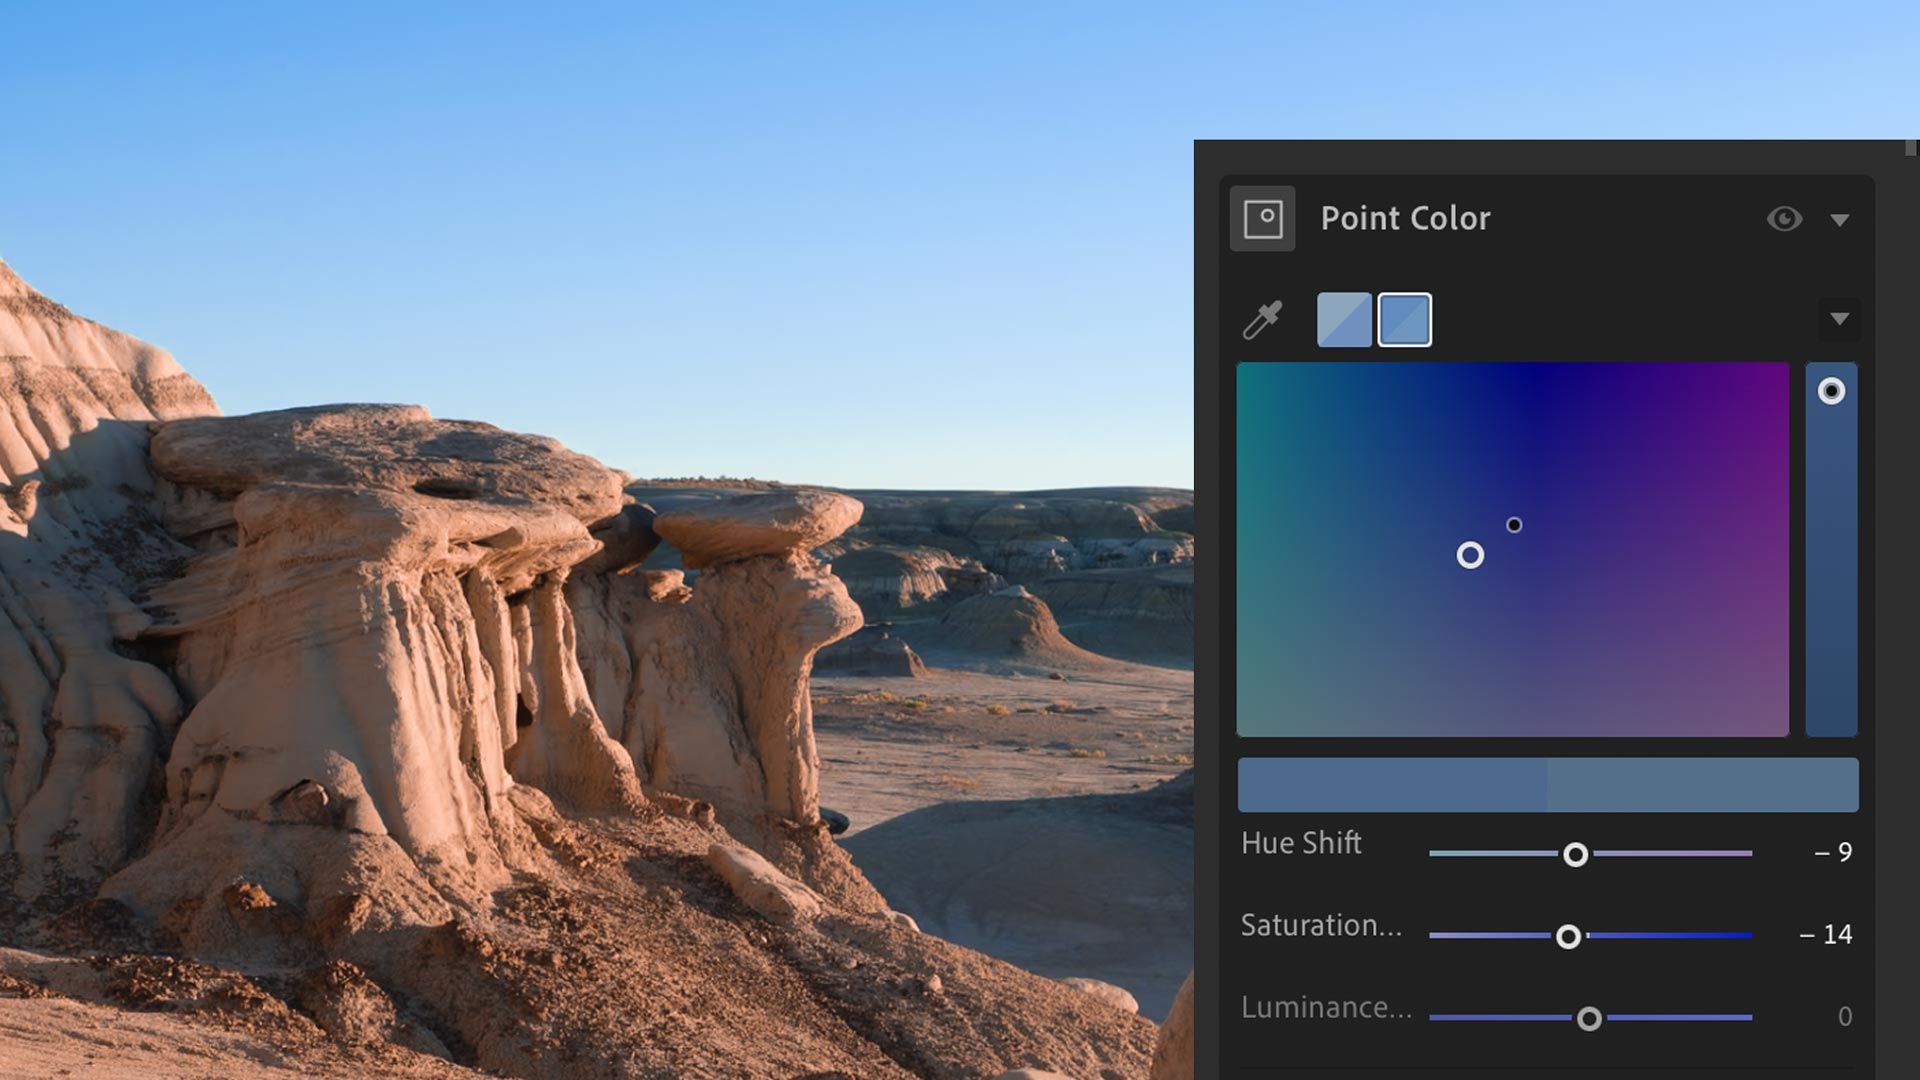
Point Color is useful, but I'm most excited to see it supported by masks. This is great, for the HSL panel has never been an option when applying local adjustments using a mask. Point Color opens up more opportunities for localized color selection and editing, which is excellent.

Lens Blur
Lens Blur is an entirely new tool that uses artificial intelligence to simulate shallow depth of field and bokeh in a raw image. It works by automatically analyzing an image to identify its primary subject, then blurs the background, foreground, or both to simulate the appearance of increased depth. The functionality feels like a more robust, customizable version of "Cinematic" smartphone camera modes that add artificial blur and depth of field.
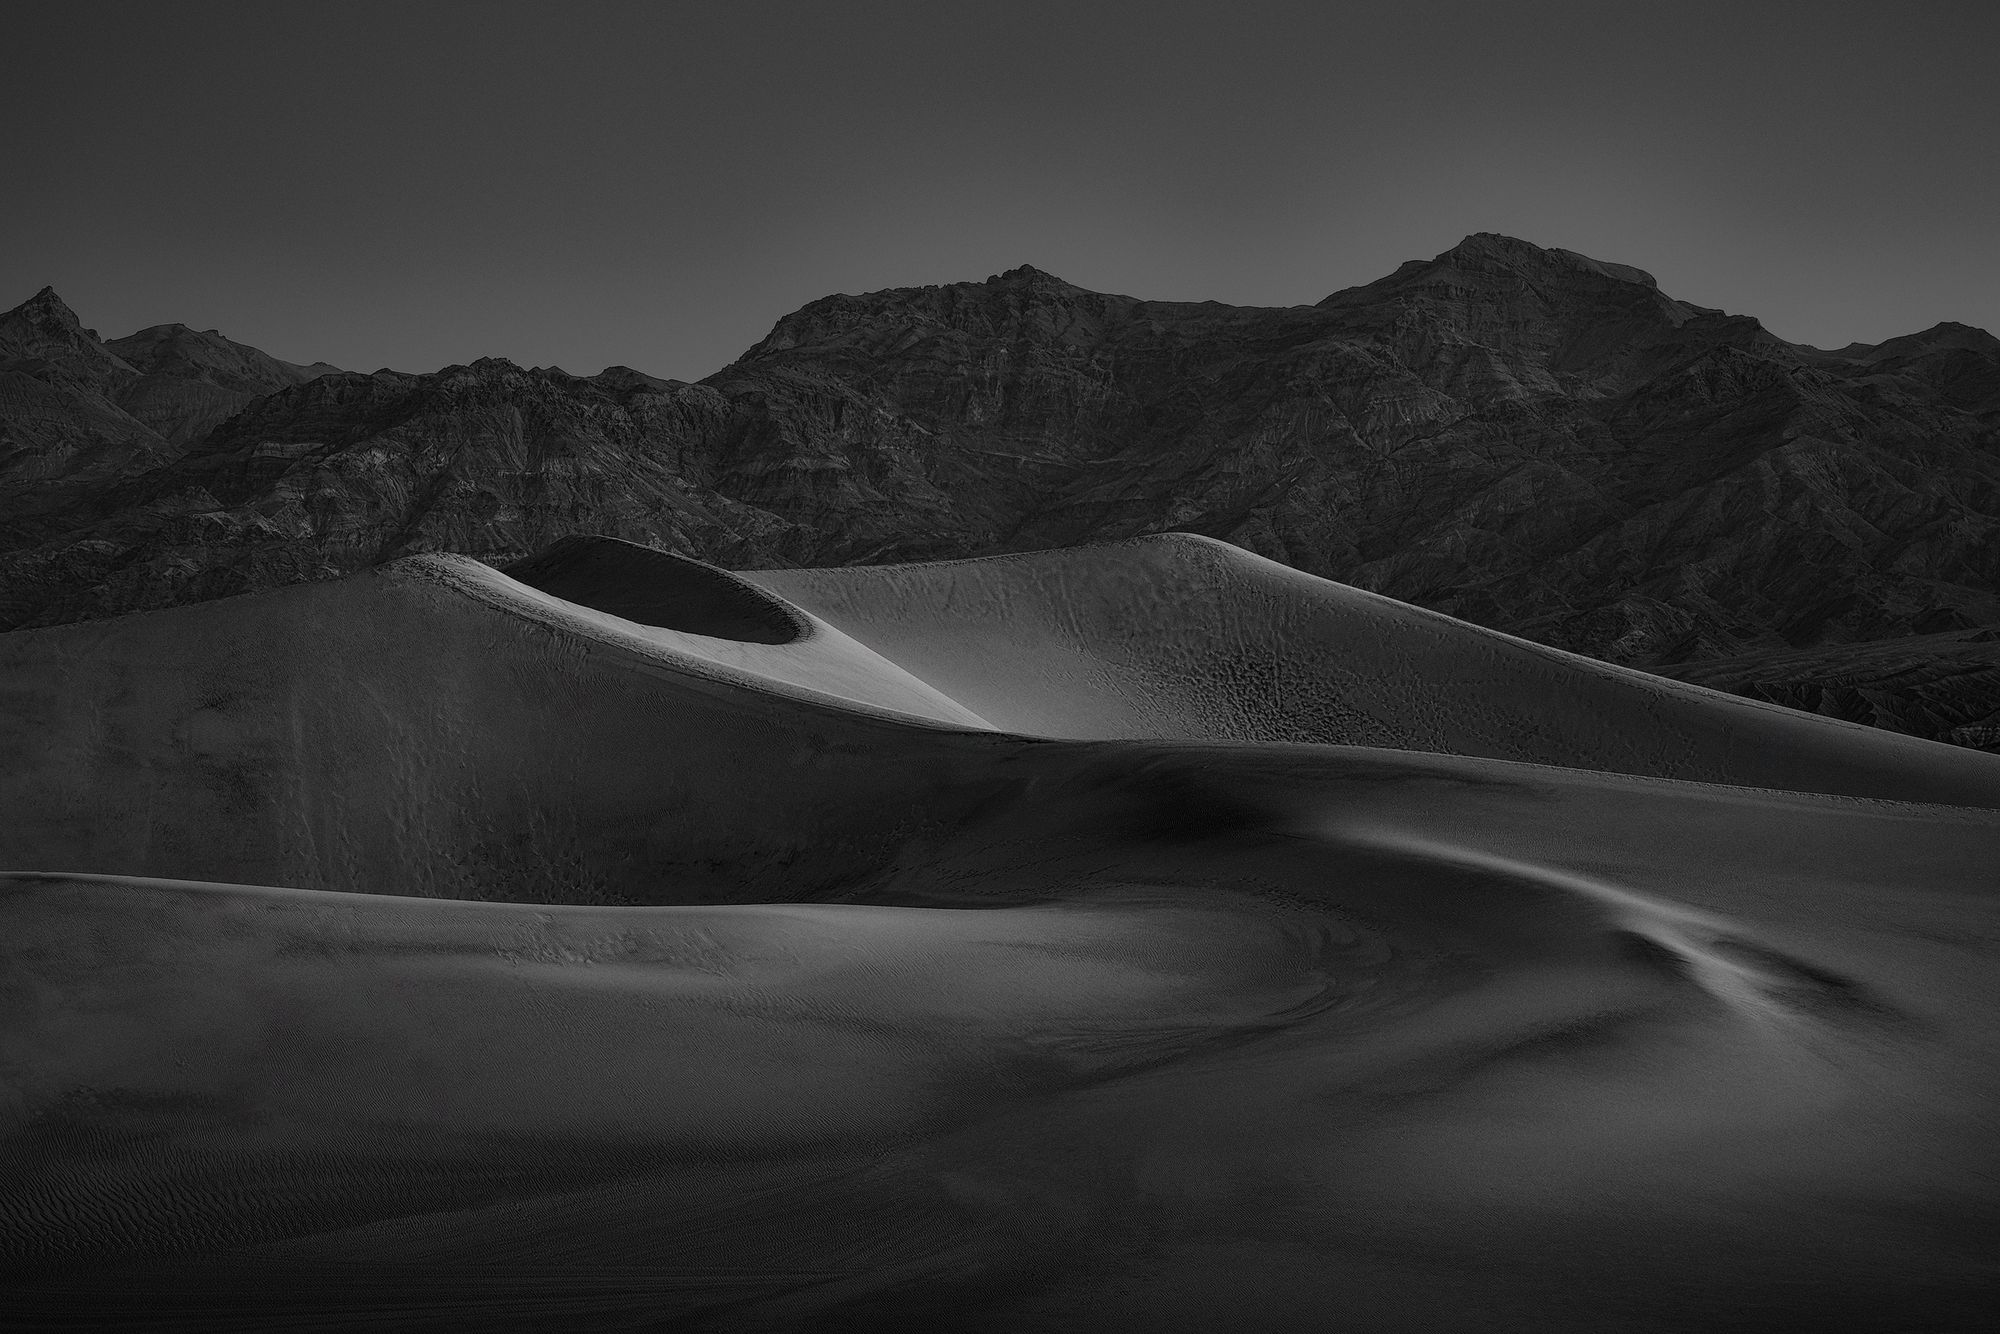
In the example image below, Lightroom blurred the rock in the foreground at far left to create the impression of increased depth.
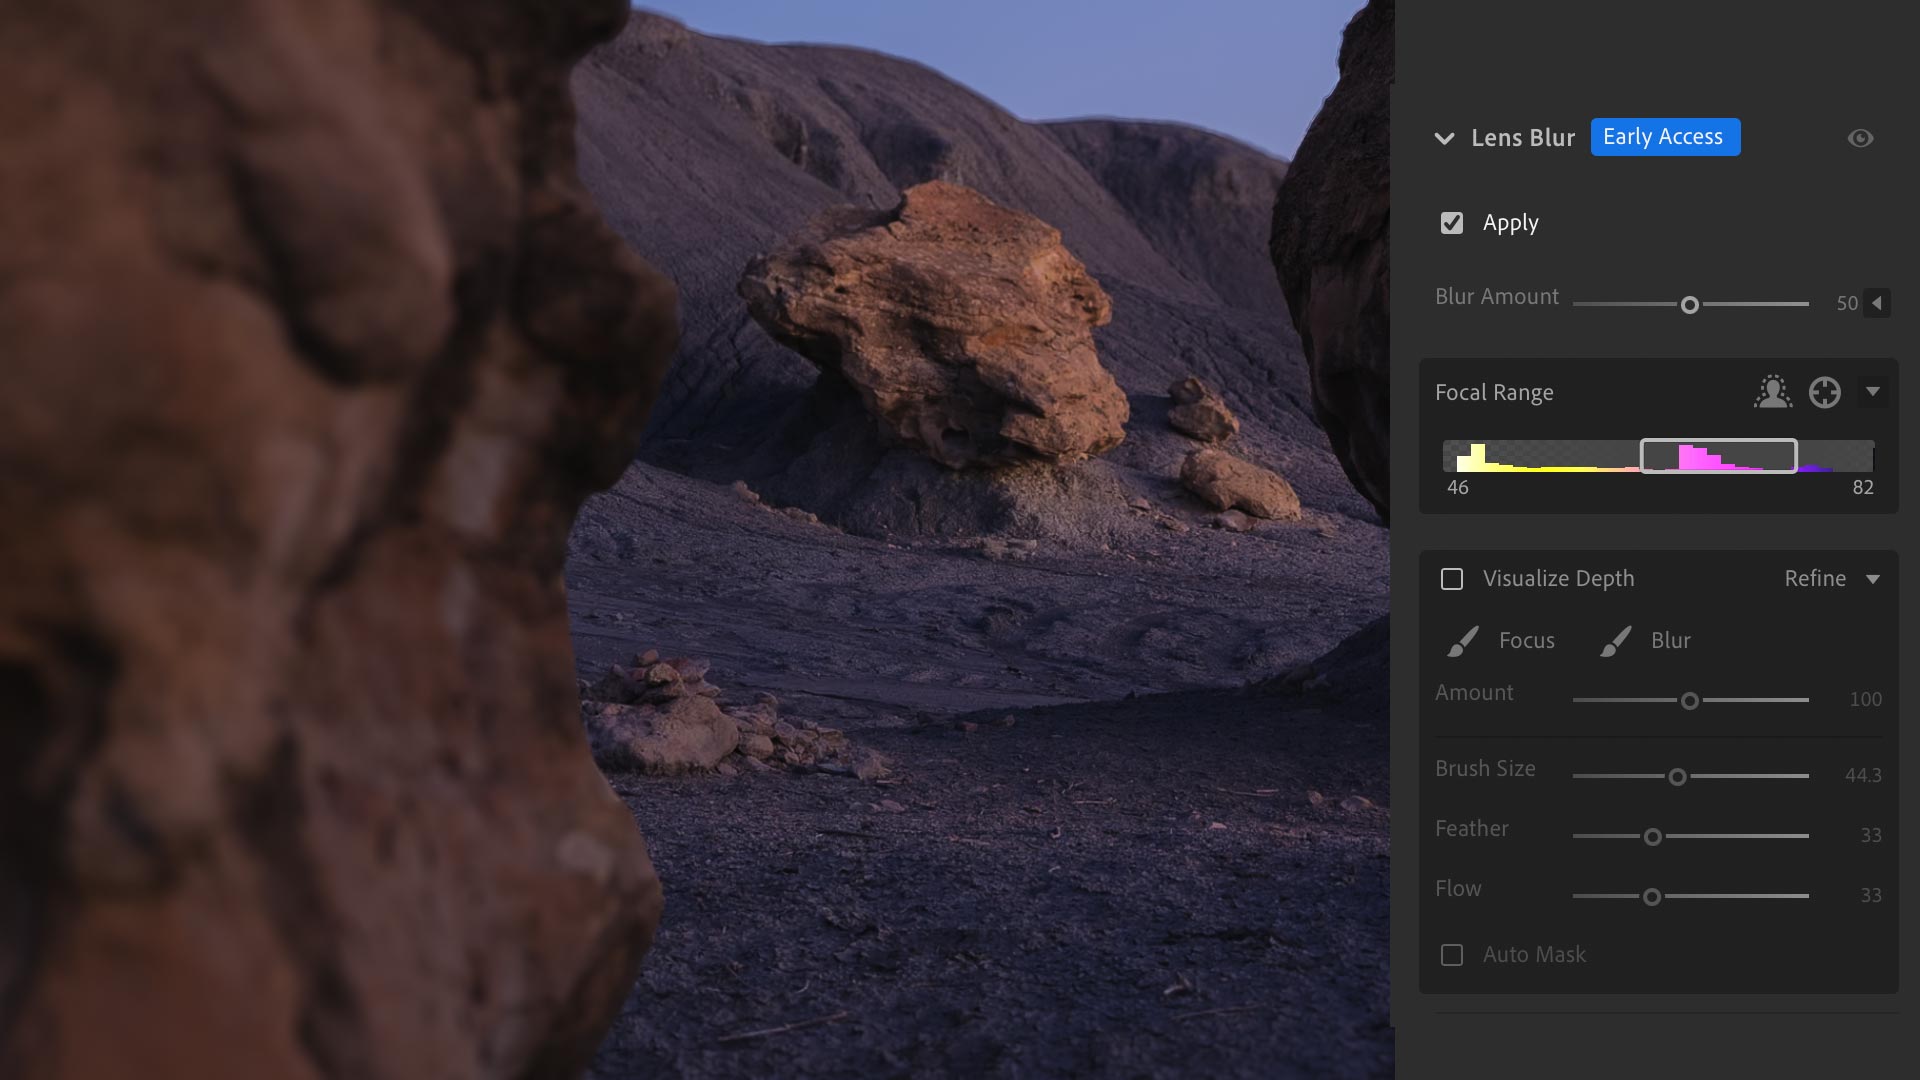
In addition to subject selection, focal range can also be assigned by clicking the Point/Area Focus tool. This allows the user to drag and select the area of the image that should remain in focus. The interface also displays a cool visualizer (strip of yellow and magenta above) that displays a spectrum of colors with an adjustable slider to control plane of focus.
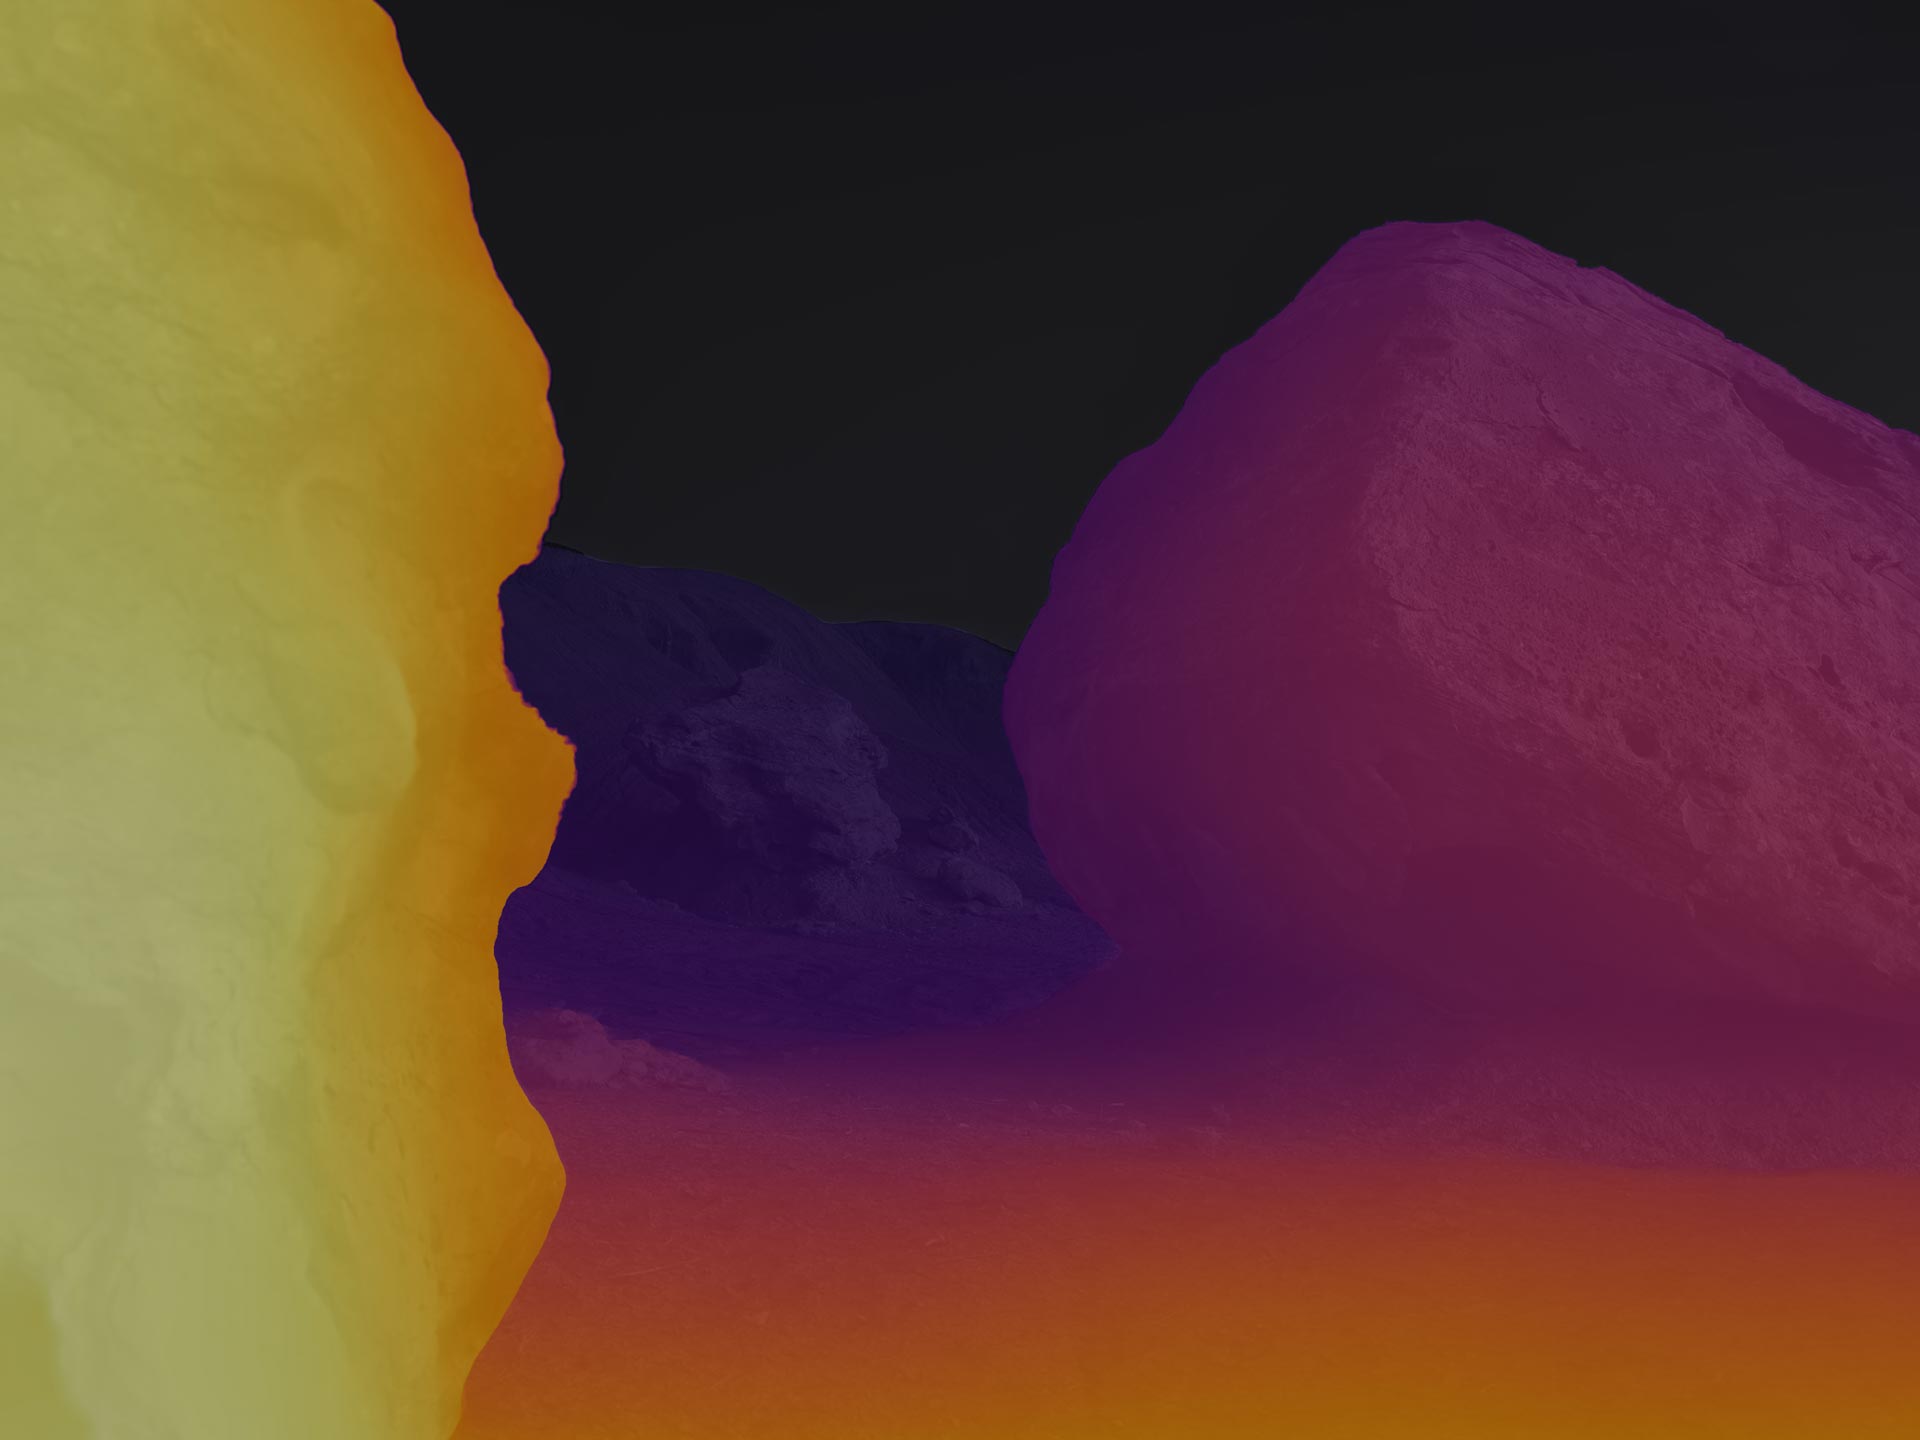
Underneath that is an additional interface with brush tools for making manual adjustments to the focal range. My favorite option here is the Visualize Depth toggle which overlays the aforementioned color spectrum on top of the image. For example, as seen in the image below, the blur effect is being applied to the yellow areas at far left and some foreground at the bottom. Wild!
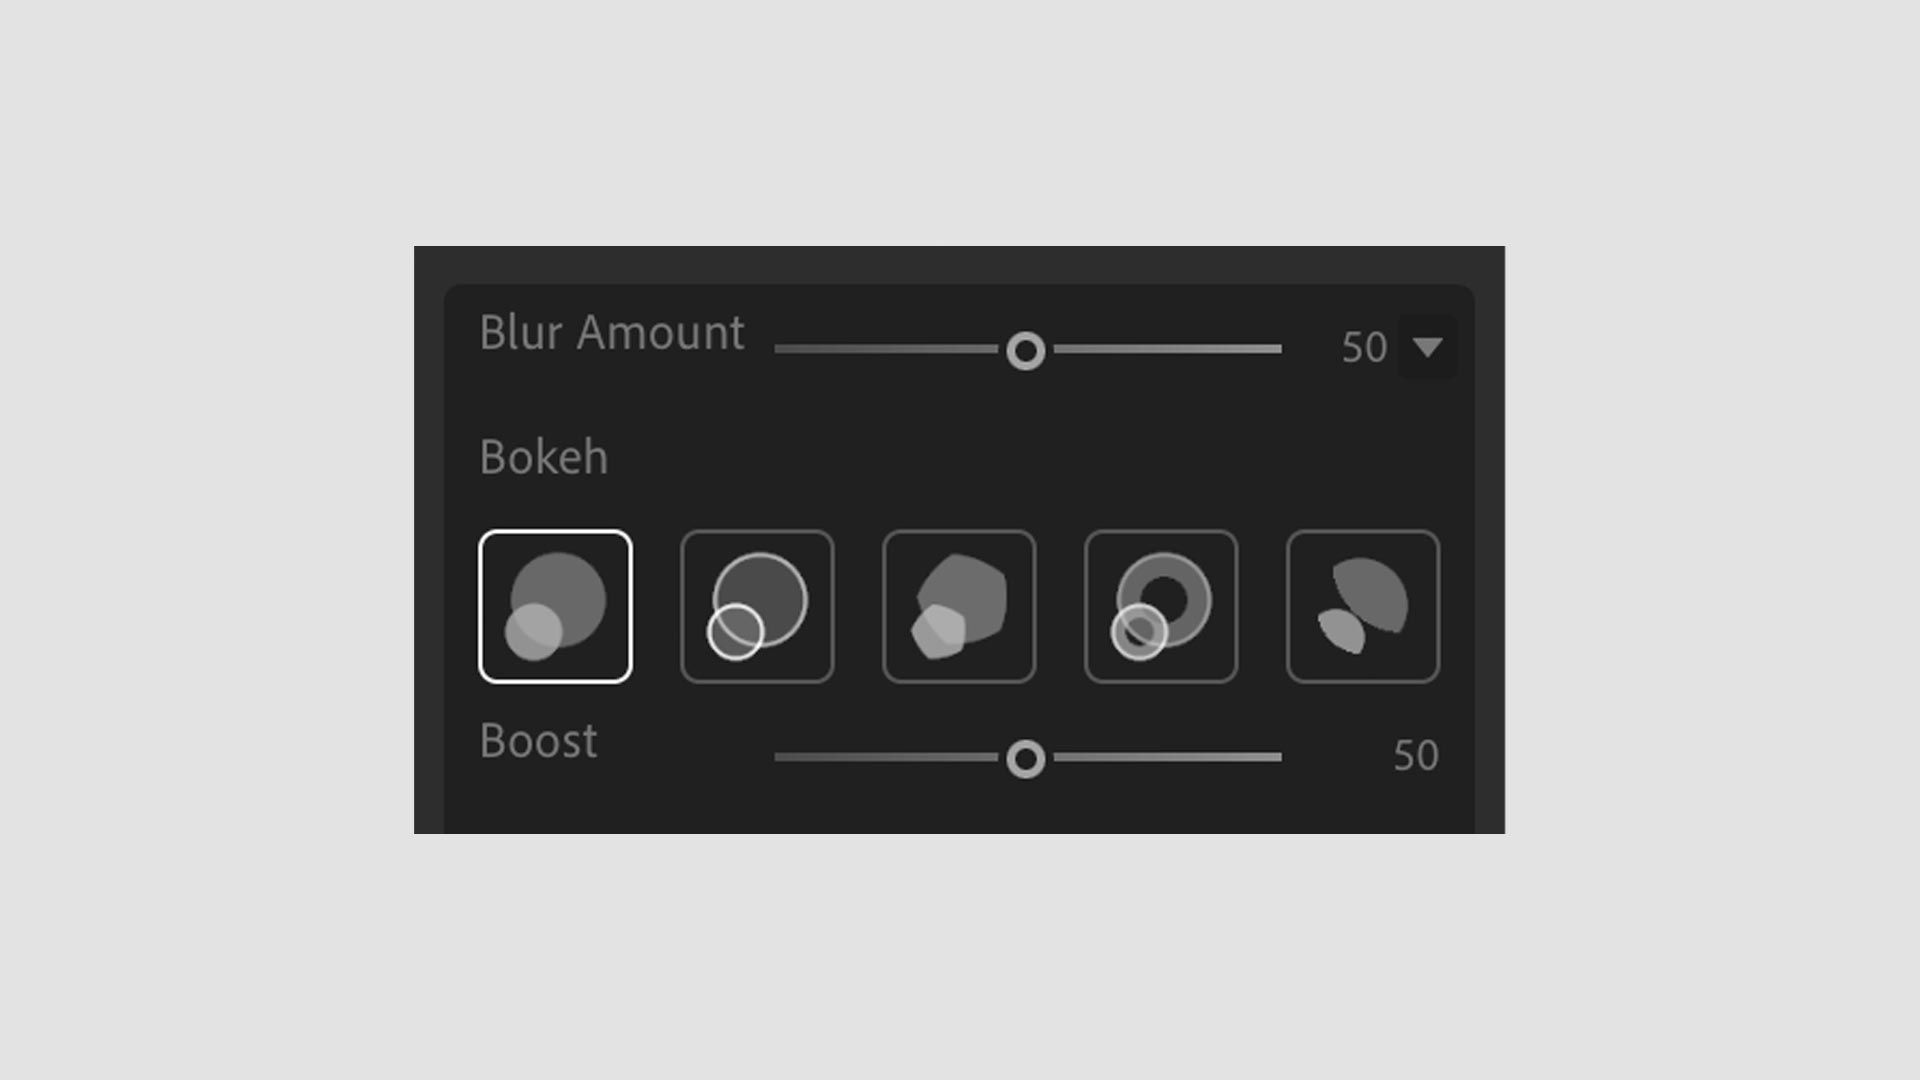
Finally, there are five bokeh styles that are made available when toggling open the Blur Amount interface. Here's what the interface looks like.
For people who primarily shoot portraits, weddings, products, food, etc, I can see how the Lens Blur tool would be useful, especially with images captured using closed-down apertures (eg, f/8). With careful selection and tasteful application, Lens Blur could create more drama and visual appeal by increasing the perceived depth of a subject.
Because I'm primarily a landscape photographer, shallow depth of field isn't something I typically use, so I doubt Lens Blur will be helpful to me and my style of photography. However, I am excited about Lens Blur because I think it could lead to something even more useful.
Future depth range mask?
One of the things I've always wanted in Lightroom and Camera Raw is a range mask for depth. A mask that automatically detects the foreground, midground and background, which could then be subtracted or intersected with another to create a more precise selection.
Lightroom includes a Depth Range mask, but this mask only functions (currently) with HEIC images containing depth map data captured using the iPhone's Portrait mode. In other words, not useful to anyone shooting with a traditional digital camera.
But if Adobe were to take the underlying, depth detection engine of the Lens Blur tool and build a new range mask with it, it could be a powerful and useful tool when making local adjustments.
I'd love to see this happen.
Local editing in Lightroom CC
Also through this most recent update, Adobe added local image editing to Lightroom CC. This functions similarly to raw editors like DxO PhotoLab by allowing users to browse and edit image files directly from their local hard drives. This works without importing images to a catalog, and allows users to organize the images however they want using folders created by their operating system.
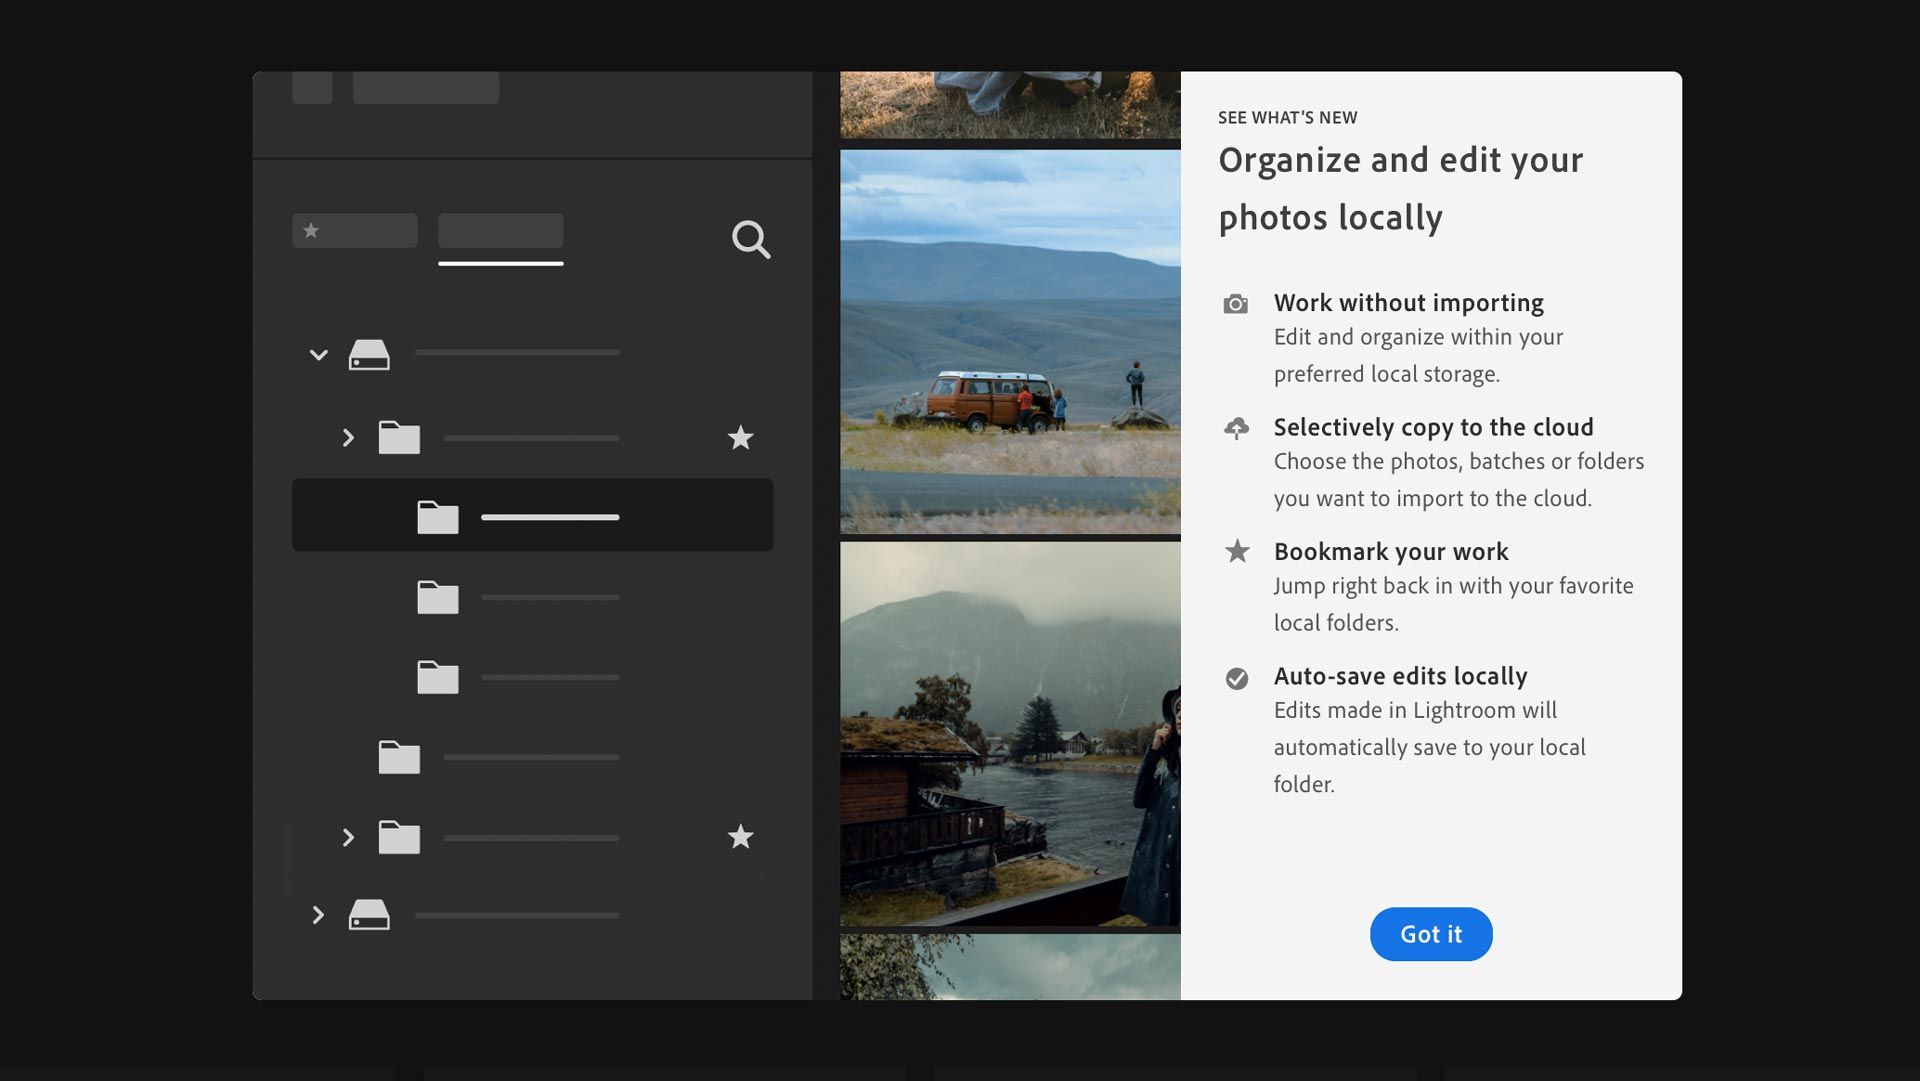
Local file editing has always been one of the main differentiators between Lightroom Classic and CC, and one of the reasons why many photographers have stuck with Classic. But with this new update to CC, photographers no longer have to sync terabytes of photos to Adobe's cloud. They may store and edit their images locally (which saves money), then selectively copy images to the cloud if they want the benefits of photo syncing across multiple devices.
There are some limitations, including the inability to group local images in albums, and the filtering/searching tools aren't as robust. But this could be a notable first step towards decommissioning Classic and migrating users to CC.
When you think about it, it makes sense. Maintaining two versions of Lightroom has to be a drain on Adobe's internal product development team, and likely slows their ability to provide updates. It adds confusion to their product line for new users, and doesn't make sense when both applications provide nearly the same tools and functionality.
I love Classic, but I also appreciate the cleaner, more modern interface of CC, and would appreciate a more streamlined user experience when syncing and de-syncing images from the cloud. If Adobe could further improve CC's local file storage and editing, more Classic users (like me) would likely make the switch.